Small fairy house finished!

I’m excited to be done with another paper mache fairy house! The inside will be left empty, since this fairy house belongs to my daughter (at least that’s what she believes, and I’m not going to try and convince a 2 year old that it doesn’t!). She loves to play in it, and in the past it has made a great “barn” for Sven and Christoph when she gets her Frozen dolls out!

Fairy house miniature fantasy dollhouse by beneath the ferns


I went with a grey color for the roof, since the other houses in the village have had a lot of warm brown tones.

Fairy house fairy gardens miniature elf house by beneath the ferns

Fairy door miniature dollhouse polymer clay


The small accents around the fairy house windows are remnants from another project for my book, a laser-cut spiral staircase. I’m glad to put them to good use!

Fairy door for miniature fairy house by beneaththeferns


Fairy garden accessory elf boot with mushroom


Miniature fairy house dollhouse fairy door from polymer clay


This year has been busy (having a baby!), so I’m glad I got a project done that I started a while back. If you want to visit the other fairy houses I’ve made so far, click HERE.

And if you’d like to see how the roof is built, click HERE.

Thanks for visiting!
~Jessi

Advertisement

Birthday fairy garden, entry #3 for contest from Fairygardens.com

With fall quickly approaching, my summer fairy gardening is coming to a close. What better time to look through what has been created this summer than a cold, rainy day such as today? To make the walk down memory lane even more fun, the folks over at Fairygardens.com are holding their annual fairy garden contest, which is a great way for everyone to come together and share their creations over the past summer. It’s sort of a “harvest” of great fairy garden ideas!

Here is my entry #3, a birthday inspired fairy garden I made for my mom. We don’t live as close to each other as we used to, so I made a little “picnic” table where our fairies can  sit together and share a giant birthday cupcake!

Miniature fairy gardens pathway birthday theme

Miniature fairy garden birthday theme pathway from efairies
The chairs are made from the tops of really expensive beers that my hubby drank… And there is even a miniature card for her.

Miniature fairy garden birthday theme bird house
I made a matching birdhouse and birdbath, I love how the copper roof on the birdhouse looks!

Birthday fairy garden theme with miniature picnic table
The plants I put in here had a bald patch, so I filled in the area with some little mushrooms!

Miniature fairy gardens summer accessories birthday theme

I was happy with how the garden turned out, and really happy to be able to give it to my mum! Happy Birthday Mom! ♥

Want to see more fairy gardens, or enter your own in the contest? (Come on, it’ll be fun!) Visit www.fairygardens.com/contest/ or click the picture below to see what others have created!

Fairygardens.com fairy garden contest

Baby fairies in the garden!

I anticipate that this might be my last post for a while, as my husband and I are about to welcome our second child, a baby boy, into the world! Our two-year old daughter is so excited, and tells everyone “I’m ‘onna be a big sista!” So the only fitting way to share this experience is to imagine how our fairy friends might also celebrate the coming of a new little one… Here are a few of my favorites from Etsy, and they’d all make a great addition to any fairy garden! Just click the pictures to go to their shops on Etsy ♥

Tania from Fairy Shadow makes these adorable little Waldorf-inspired fairies, complete with a felt leaf to hide in! I love the tiny antennae and all the details in the leaves!
Fairy garden baby miniature figurine by Fairy Shadow

Garnett over at Garnetth makes little wee ones that are so natural, they look like something you might find if you start looking under all the leaves in your fairy garden!
Fairy garden baby miniature figurine by Garnetteh

There’s something about this sweet babe that really captures a newborn…maybe it’s the round little cheeks and button nose, but this polymer clay fairy reminds me of my own daughter when she was born! (By Jennifer at Gnome Woods)

Fairy garden baby miniature figurine by Gnome Woods

I love how Agnes at Sacred Jewel matched tiny little wings with this sleeping fairy! The colors are so soft and muted, they fit right in with the milkweed cradle!

Fairy garden baby miniature figurine by Sacred Jewel

This sweetie looks like her wings are drying out, and when she wakes up, she might just be ready to explore her world! Paula at Trilliants makes amazingly realistic fairy figurines!

Fairy garden baby miniature figurine by Trilliants

And finally, here is the exhausted momma fairy, grabbing a quick nap while she can before her little one wakes up again! (By The Little Hedgerow)

Fairy sleeping miniature garden figurine by The Little Hedgerow

Thanks for reading, and hopefully I’ll be able to catch some sleep like the fairy above! Have a wonderful June, and I’ll return soon with another little fairy of my own 🙂

~ Jessi

Fairy garden accessories from fresh shops on Etsy

Fairy gardens are one of the hottest new trends in gardening! A quick search on sites like Pinterest will show how many amazing artists are creating adorable treasures for the fairy folk. Among these talented artists are a few I found on Etsy with original ideas for creating fairy garden accessories and supplies. In such a big marketplace, these artisans have found their own niche. Check out these fresh shops and see if there isn’t something that you need in your own fairy garden! (Click each picture to go to their shops)

I’m in love with this fairy house! Look at all the details carefully carved into the side of the stump (RooPottery also offers all the other accessories you see in the picture in their shop)

Fairy house miniature gnome home by Roo Pottery

These miniature fairy house windows will turn any regular stump into a home for our little friends! The color on each window seems to blend perfectly with the garden foliage around them. (By TGO2014)

Fairy gardens supplies miniature windows by TGO2014

This hobbit house is soooo cute, I can imagine creating a whole hillside full of them! (Aka, The Shire!) Kara does an amazing job, and sells the hobbit house as a kit, allowing the customer to personalize each fairy garden as they create it. (By Mossy Pocketss)

Hobbit house fairy gardens supplies by Mossy Pocketss

Next is an elegant little chair, fit for fairy royalty! I love the way the jewels sparkle and accent the purple flowers in the background. What color flowers would you plant next to this adorable fairy chair? (By Fairy Fountain Minis)

Fairy gardens supplies miniature chair by Fairy Fountain Minis

I’m blown away at all the detail that Michelle from Fairy Creek Lane has put into this little clothesline! Each heart is hand-crocheted, and attached with a miniature clothespin. Sooo cute!

Fairy gardens supplies miniature clothesline by Fairy Creek Lane

This little hummingbird feeder looks so real, I wouldn’t be surprised if real hummingbirds stop by to check it out! The Enchanted Acorn makes these miniature feeders in different colors and styles to match the look of your unique fairy garden.

Fairy garden accessories miniature hummingbird feeder by The Enchanted Acorn

This miniature fence and gate are a perfect way to separate different sections of your fairy garden (I can imagine rich, green moss on the outside, and a miniature vegetable garden on the inside!) Cammy from the Misty Hollow Pixie has lots of other fairy garden supplies in her shop to go with this sweet little fence!

Fairy garden fence supplies by Misty Hollow Pixie

And finally, a fairy house so detailed and intricate, I want to move right in! Molly from Smoky Mountain Follies has an incredible eye, and has left nothing out on this magical house that started out as a garden gourd!

Fairy house miniature garden accessory by Smoky Mountain Follies

I have a feeling we’ll see lots of amazing creations from these fresh shops, and can’t wait to see what they add to their shops next!

~Jessi

Fairy house pictures: The Fairy Tower

I started this three story fairy house in December, so I’m sooo excited to see some real progress! As a full-time teacher and a full-time mom of a toddler, I don’t always have time to spend on my own hobbies. Maybe that’s why this feels like I really got something accomplished! Plus, I’m due with our second baby (a boy!) in early June, so getting this roof done was the last thing on my to-do list before he gets here! I guess I feel like I’m ready to dive into that crazy bleary-eyed-up-all-night-and-day mommy mode, but I really hope I can get more done on this house this summer…

The fairy house is made from stacking cardboard boxes together, then putting paper mache over the entire house. After many coats of paper mache and paint, I’ve finally started adding some details…

Fairy gardens house miniature scale tower by beneath the ferns close up


The miniature shake shingles are cardboard that I’ve painted, then cut apart. The windows are a design that I drew up, and my Dad kindly cut out of wood with his laser cutter (Thanks Dad!). Here are more pictures of the process…

Fairy house in progress by Beneath the Ferns stave house


Getting all the shingles glued on took much longer than I anticipated!
Fairy house miniature shake roof fantasy beneath the ferns


But I got them done!
Fairy gardens house miniature scale tower by beneath the ferns two
I found the finial on the top on clearance last year at Hobby Lobby… I thought it gave the fairy house a nice, stately look.

Fairy gardens house miniature scale tower by beneath the ferns


The “door” on the left side of the picture below is going to be attached to a bridge that the fairies can walk across to another building.

Fairy gardens house miniature scale tower by beneath the ferns three

Fairy gardens house miniature scale tower by beneath the ferns four


I need to create some doors for the balcony porch…

Fairy gardens house miniature scale tower by beneath the ferns close up front

I really want to live inside! Now I have to paint the underside of the shingles, add more doors and windows, and decorate the inside. I won’t be done for a while, but at least it gives me something to plan when I’m up for a midnight feeding!

Those are the most recent pictures, but if you want to see the whole process, check out this page here: Fairy Tower Page

Thanks for looking, and if you want to see the next photos of the process, feel free to subscribe and visit again ♥

~Jessi


How to draw attention to your fairy garden.

My fairy gardens are always in need of something “special” to catch my eye. Perhaps it is the little “pop” of red, with sprinkles of white, but one of the most eye-catching additions to any miniature garden are little toadstools (otherwise known as the fly amanita mushroom). This is no accident, mind you. There is actually some science behind it…

Fairy garden color wheel

The color wheel: each color has a complementary color that is their opposite, in this case, green and red.

Basic art classes will discuss in detail the way colors interact with each other, and the contrasting (or complementary) color to green is red. Since most plants are green (wait, they’re all green!), the best way to get someone’s attention is to add something red to the mix! Just look at the way the pictures below are surrounded by the green background of my page…sort of like a real garden.

Need some ideas to get started? Here are a few of my favorites…(Click on each picture to find out where to purchase ♥)

Fairy garden furniture by The Enchanted Acorn

I love these mushroom chairs and table! (The Enchanted Acorn!)

Fairy garden supply accessory mushroom bird house

This little bird (or gnat!) house is so sweet and tiny! The white really looks great with the red of the roof. (By Broken Sparrow Studio)

Fairy garden sign with mushroom supplies by The Ltttle Hedgerow

I love miniature mushroom accents this lovely fairy garden sign. (By The Little Hedgerow)

Mushroom fairy door by Paris Cabinet

This mushroom house could fit just as well inside your house. (By Paris Cabinet)

Fairy garden supplies mushroom by The Edgewater Shop

This fairy house is so small and delicate….check out the door handle that is made from a little gemstone! (By The Edgewater Shop)

Fairy gardens accessories miniature mushroom by Fairy Creek Lane

Another incredibly detailed fairy house! The cap is made from an acorn, and look at the carefully place moss around the door! (By Fairy Creek Lane)

Don’t they just pop off the page? I want to add them all to my fairy garden! Check out the link on each picture to see other fairy garden supplies and accessories that each of these talented shops offer ♥

~Jessi

Spring fairy house

Fairy house nature craft garden miniature


I recently had some family over, and my two nieces helped create an imaginative fairy garden made from spring flowers.  There are lots of fun accessories for the fairies to play on, from swings to a hammock!

Fairy house nature craft garden miniature

Little people love helping…Fairy house toddler nature craft garden miniature


I love this fairy swing!

Fairy furniture swing garden miniature


The window of the fairy house and a tulip tower…

Fairy house nature craft garden miniature

The completed fairy garden. To see the entire post with many more detailed pictures, click HERE! 

Fairy garden miniature house for fairies

Tutorial: How to make a mini leaf basket

Fairy gardens must be a lot of work for those little beings to maintain! I thought these baskets might lighten their loads a little…

Fairy basket tutorial miniature from beneath the ferns #miniature #fairyhouse #fairygarden #beneaththeferns

Materials:
1) Dried leaves of various sizes
2) Shallow bowl with water
3) Different shaped pens or containers
4) Natural colored string like cotton or hemp
5) Scissors
Cost: $0.00 (unless you need to go buy the string)

Fairy basket tutorial miniature from beneath the ferns #miniature #fairyhouse #fairygarden #beneaththeferns 7

Make sure the containers you are going to mold around have straight edges. For instance, because the white knife has a taper to it, you won’t be able to get the leaf basket off once it is dried.

Fairy basket tutorial miniature from beneath the ferns #miniature #fairyhouse #fairygarden #beneaththeferns 2

1) Soak your leaves in water until they are soft and pliable. I usually let mine soak for at least an hour. Also soak the thread you are using, it makes it fit much tighter once you tie it on.

Fairy basket tutorial miniature from beneath the ferns #miniature #fairyhouse #fairygarden #beneaththeferns 3

2) Pick your leaf, and carefully wrap it around your container. Make sure the entire bottom of the container is covered or your basket will have a place to leak the contents. (This part can be frustrating! If you have another pair of hands to help you, that would make this step much easier!)

Fairy basket tutorial miniature from beneath the ferns #miniature #fairyhouse #fairygarden #beneaththeferns 4

3) Tie the wet thread around your leaf (sometimes I also cheat and use a rubber band first, then just cut it off later)

Fairy basket tutorial miniature from beneath the ferns #miniature #fairyhouse #fairygarden #beneaththeferns 5

4) Set your leaf on a flat surface and let it dry completely. Make sure your basket is standing upright so the bottom forms a nice flat base. This will help it stand up later once it is dried.

Fairy basket tutorial miniature from beneath the ferns #miniature #fairyhouse #fairygarden #beneaththeferns 6

Different containers make different baskets…

Fairy basket tutorial miniature from beneath the ferns #miniature #fairyhouse #fairygarden #beneaththeferns 7

5) Once your basket is completely dry, use your scissors to trim the ends of the thread you used. You are done!

Fairy basket tutorial miniature from beneath the ferns #miniature #fairyhouse #fairygarden #beneaththeferns 8

It’s so fun to see what each basket is going to look like! Remember to handle them very carefully…

Fairy basket tutorial miniature from beneath the ferns #miniature #fairyhouse #fairygarden #beneaththeferns 10

Now let the fairies start putting them to use in the pantry…

Fairy basket tutorial miniature from beneath the ferns #miniature #fairyhouse #fairygarden #beneaththeferns 11

Fairy basket tutorial miniature from beneath the ferns #miniature #fairyhouse #fairygarden #beneaththeferns 13

Fairy basket tutorial miniature from beneath the ferns #miniature #fairyhouse #fairygarden #beneaththeferns 12

Fairy basket tutorial miniature from beneath the ferns #miniature #fairyhouse #fairygarden #beneaththeferns 14

Fairy basket tutorial miniature from beneath the ferns #miniature #fairyhouse #fairygarden #beneaththeferns 15

Good luck and have fun! I’d love to see your pictures if you make this project! I’m sure everyone has unique leaves where they live that would make slightly different baskets 🙂

~ Jessi

(Don’t want to forget this? Just pin for later: ♥)
Fairy basket tutorial miniature from beneath the ferns #miniature #fairyhouse #fairygarden #beneaththeferns

Tutorial: How to make a miniature garden path

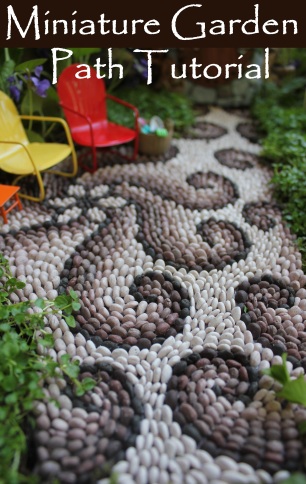
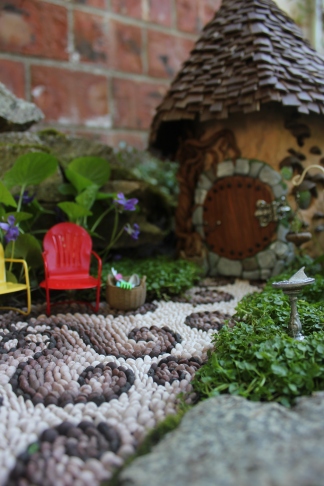
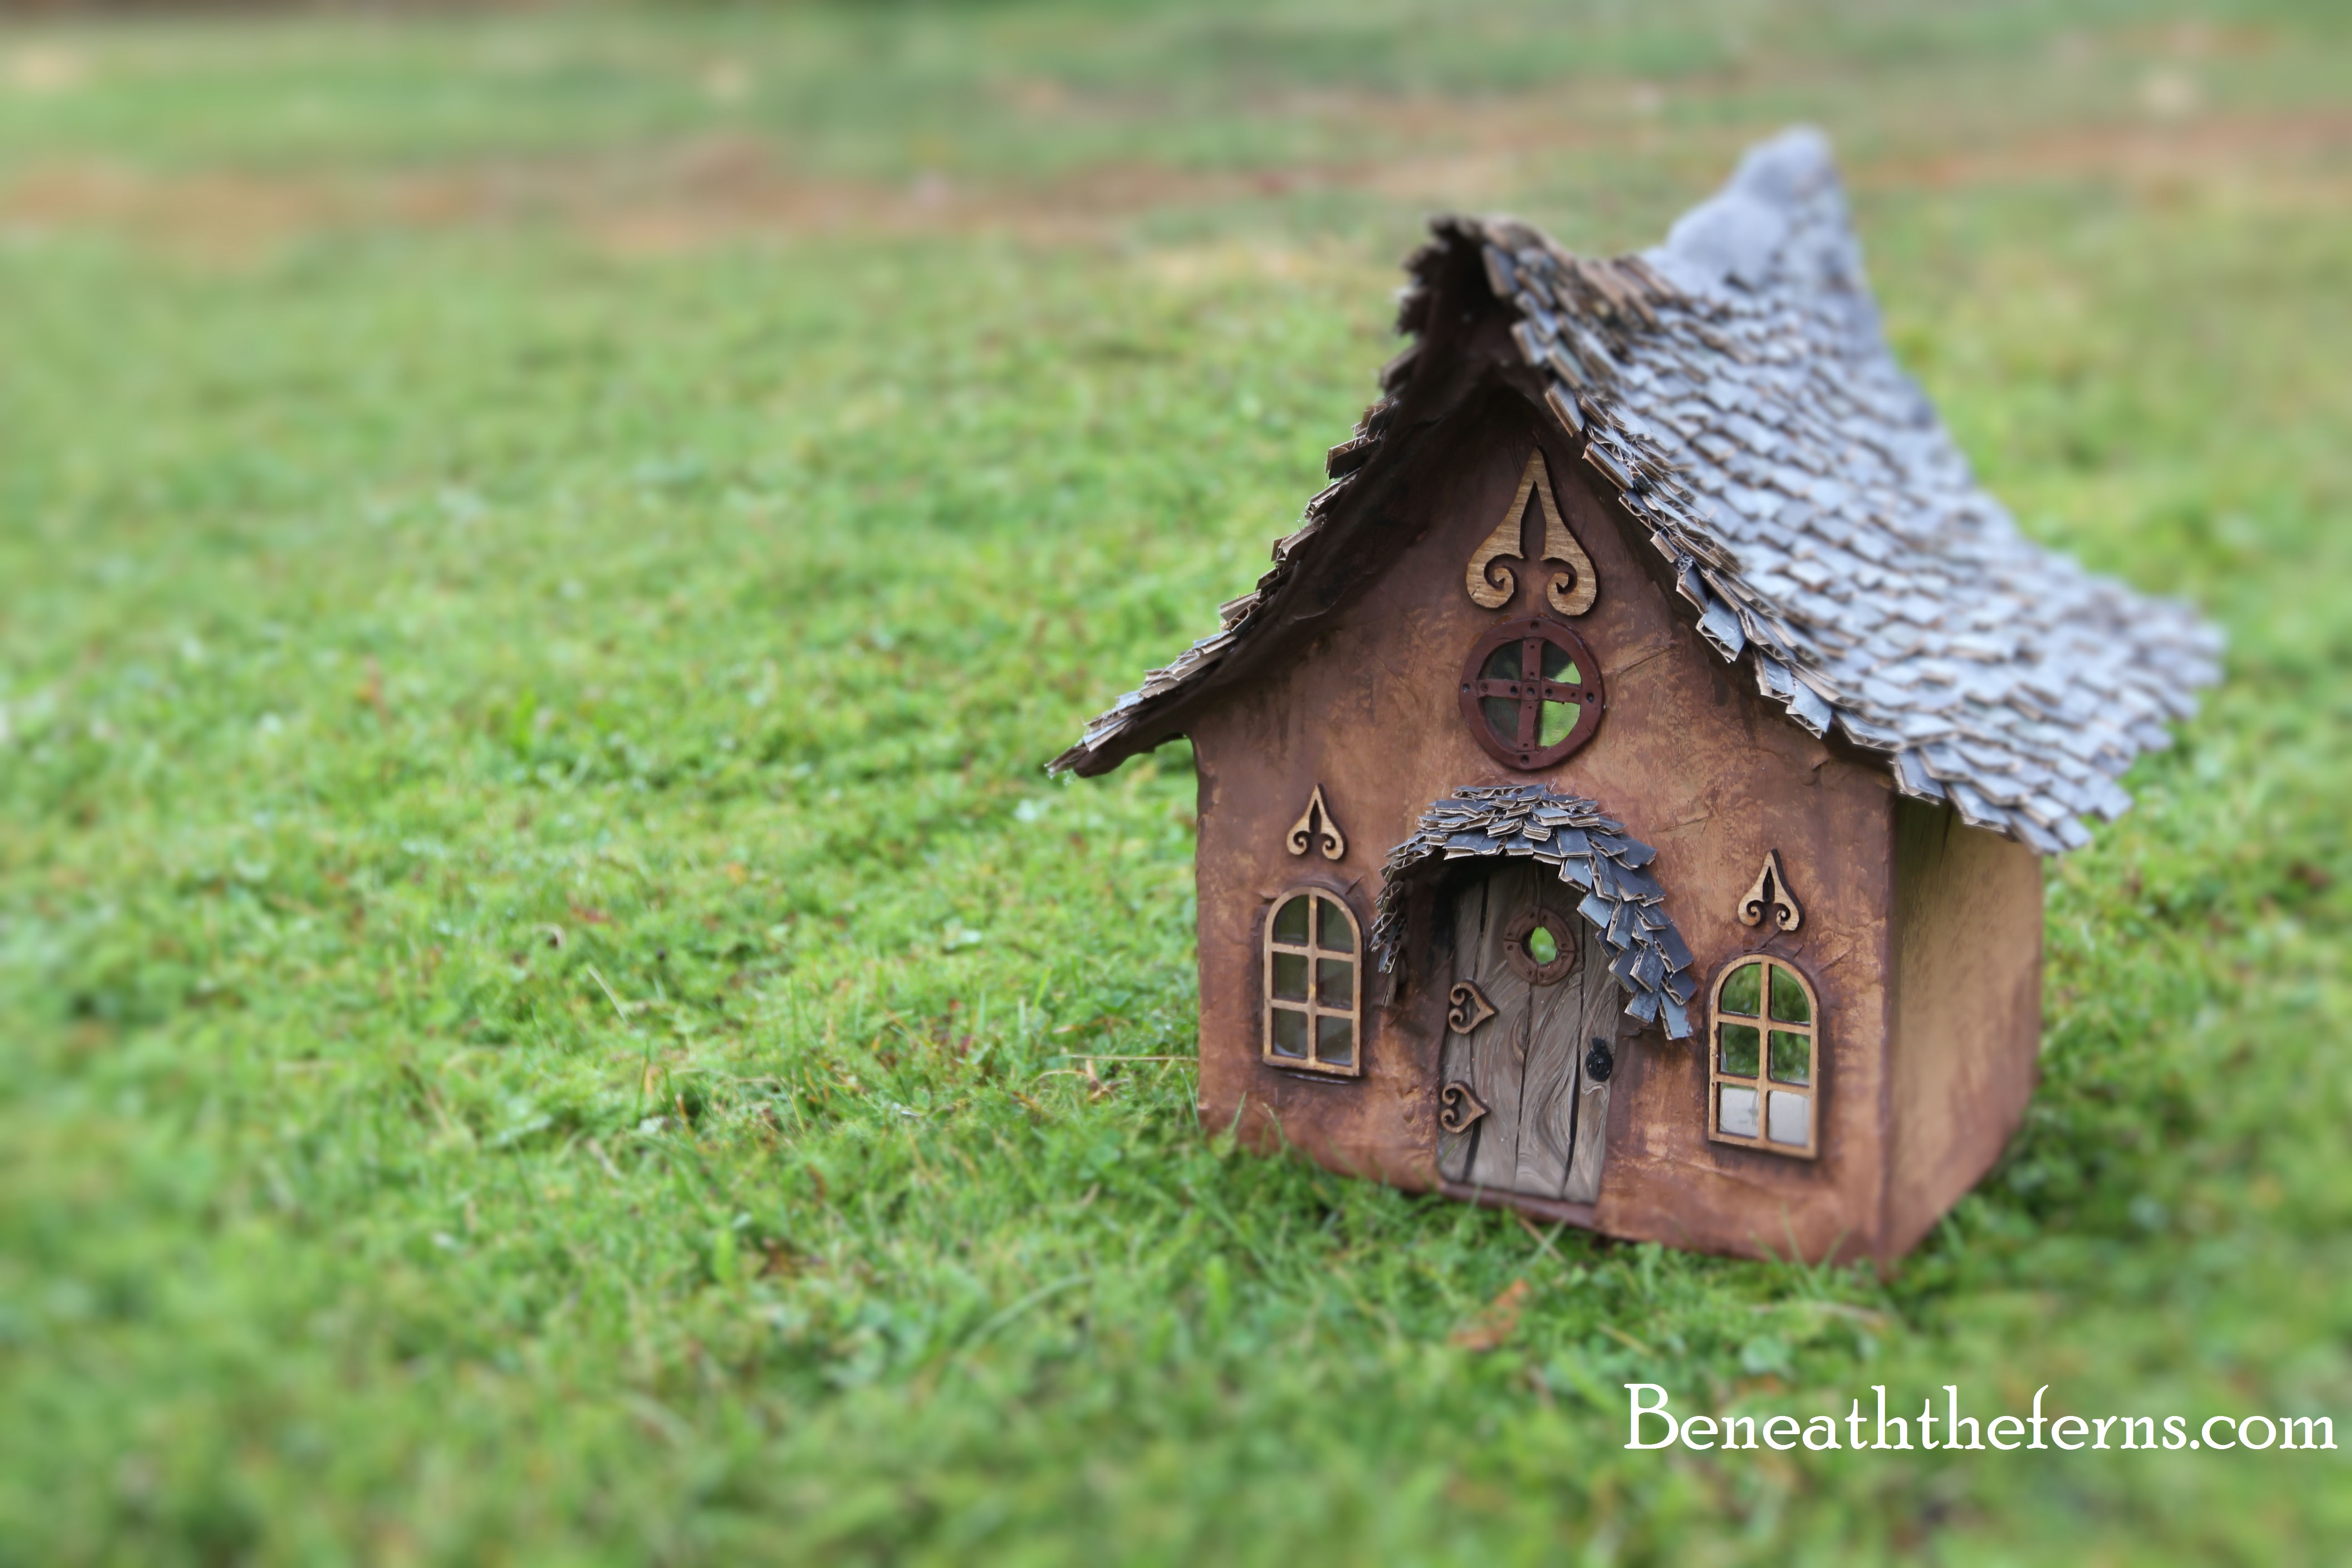
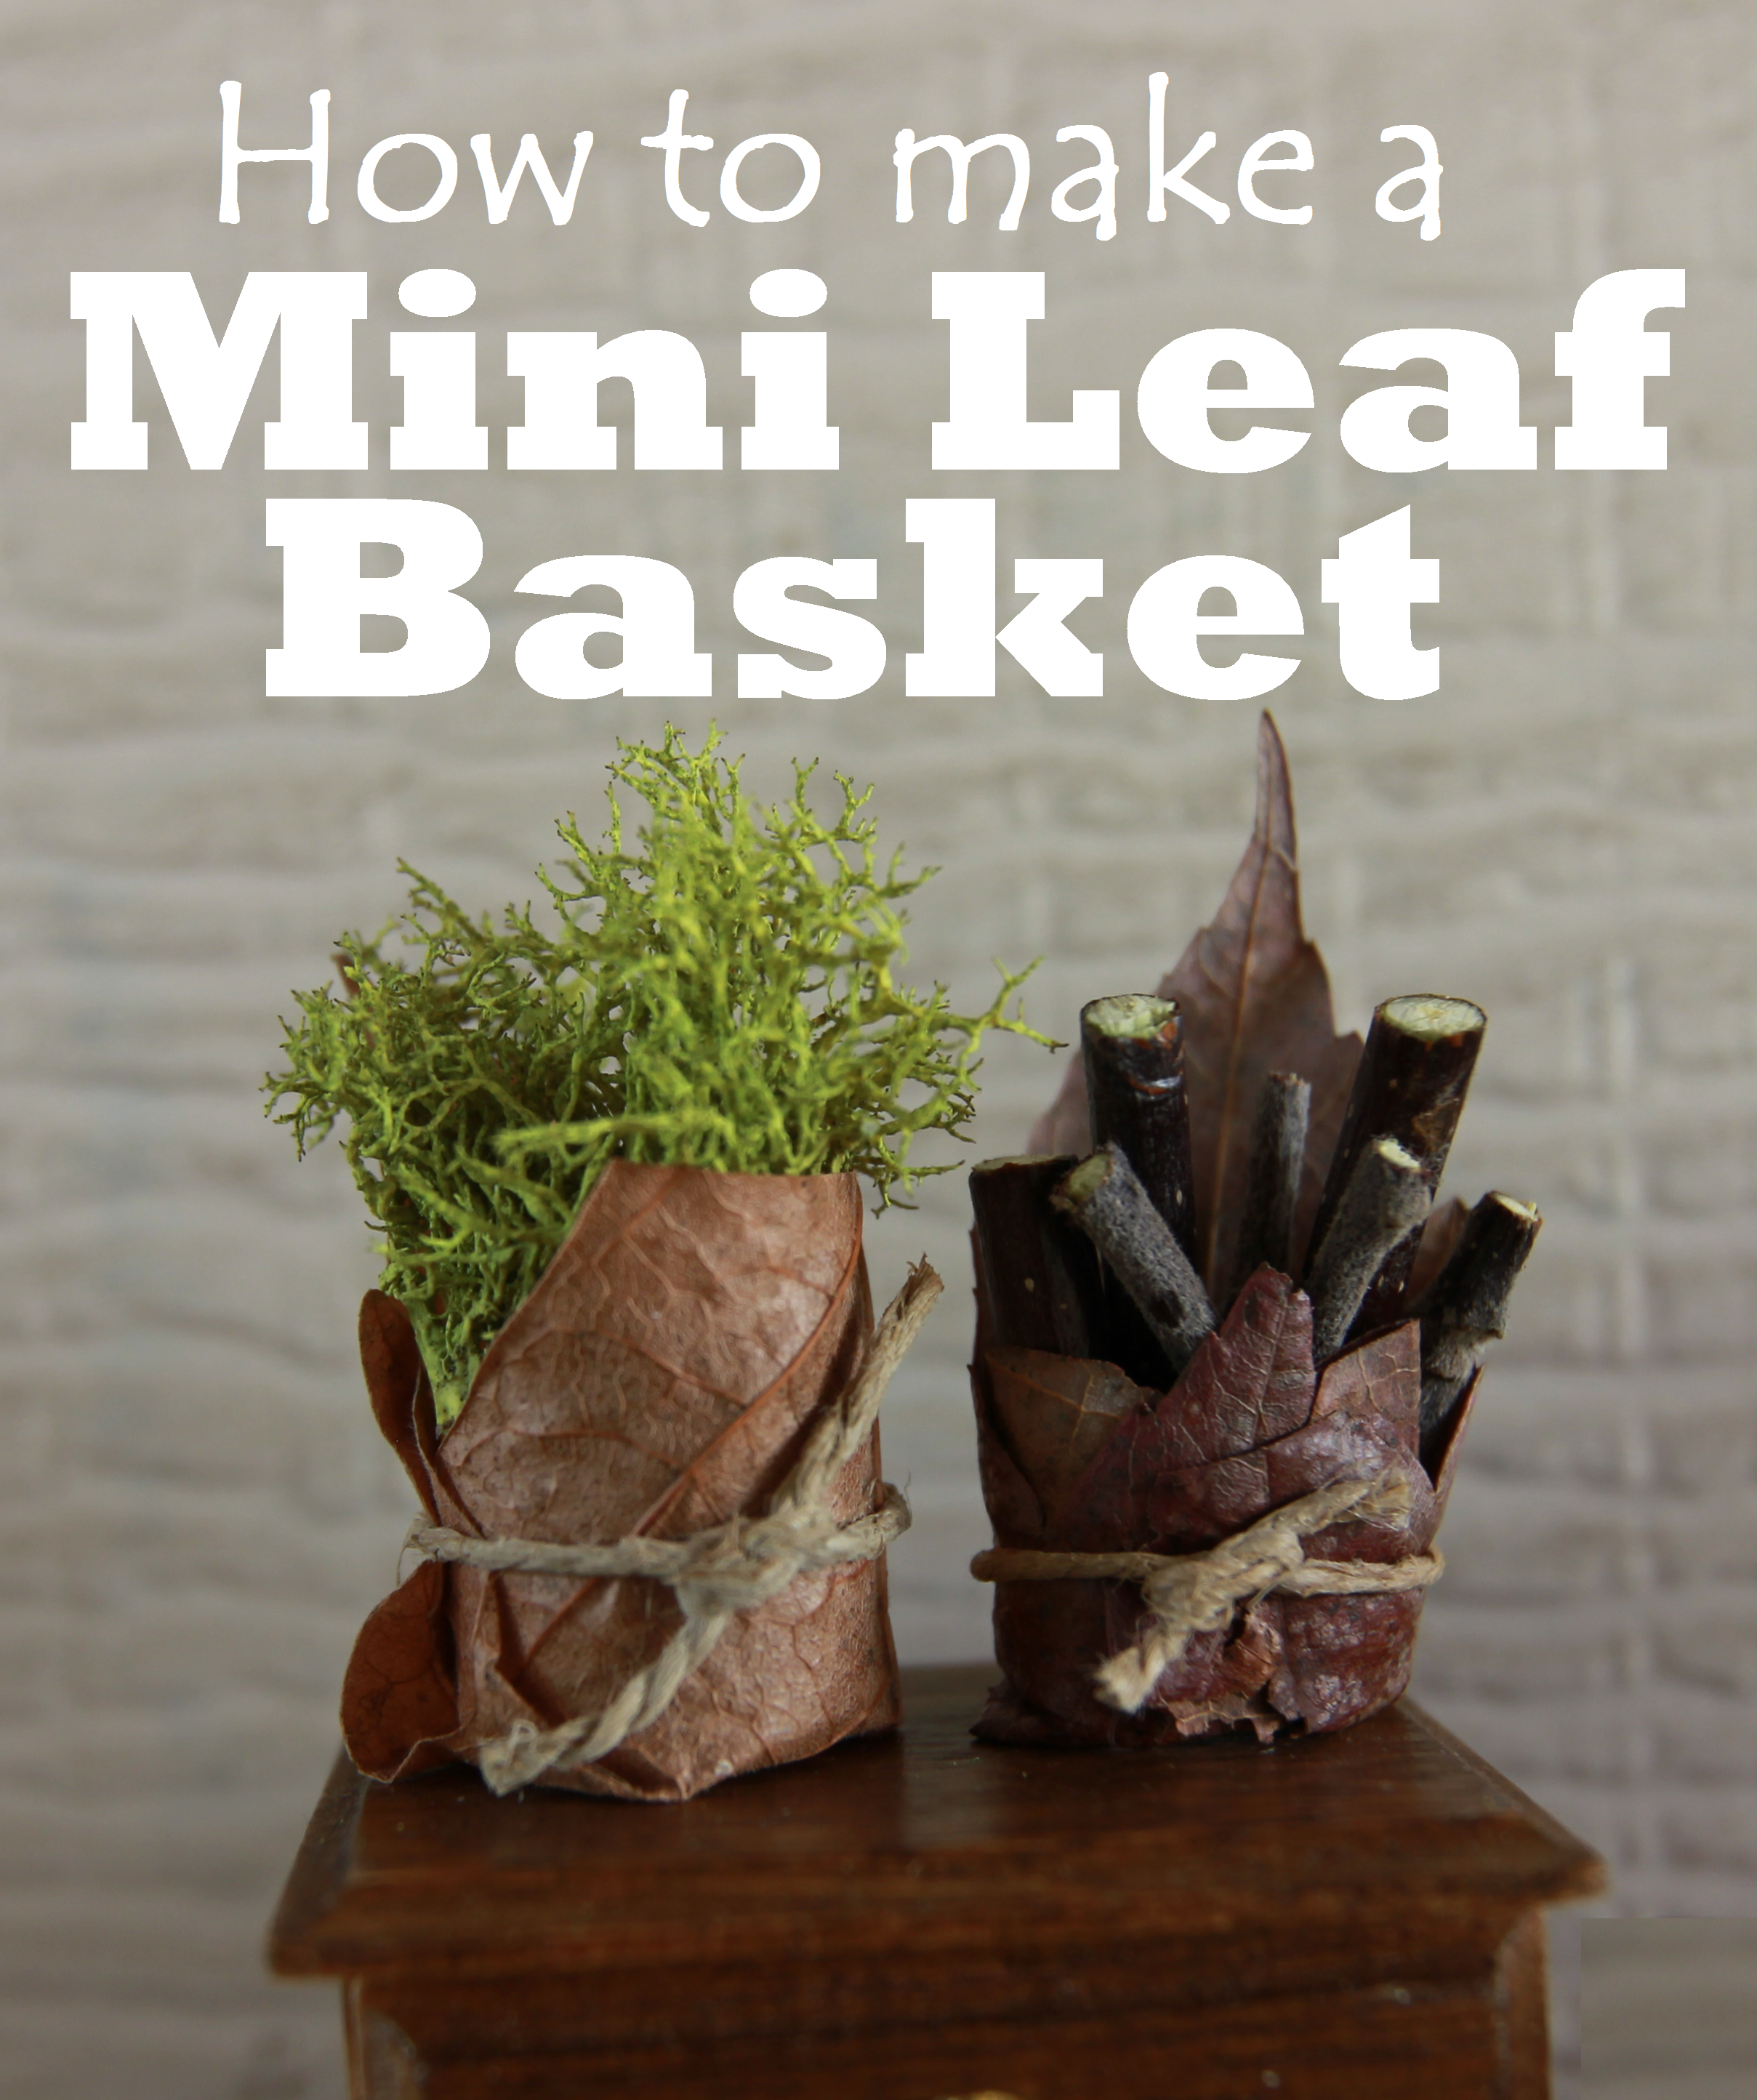
Last year I made a little “Hobbit House”, and wanted to have someplace outside where I could do some landscaping around it. I could just imagine the little people who might come and move in, and wanted to make it as nice as possible for them! One idea I always have wanted for my own garden is a pebble mosaic garden path. So rather than build one full sized, I decided my little fairy friends might like one too!

Tutorial Fairy house fairy garden miniatures at beneaththeferns.w... #Fairyhouse #fairygarden #miniature #beneaththeferns

Materials:
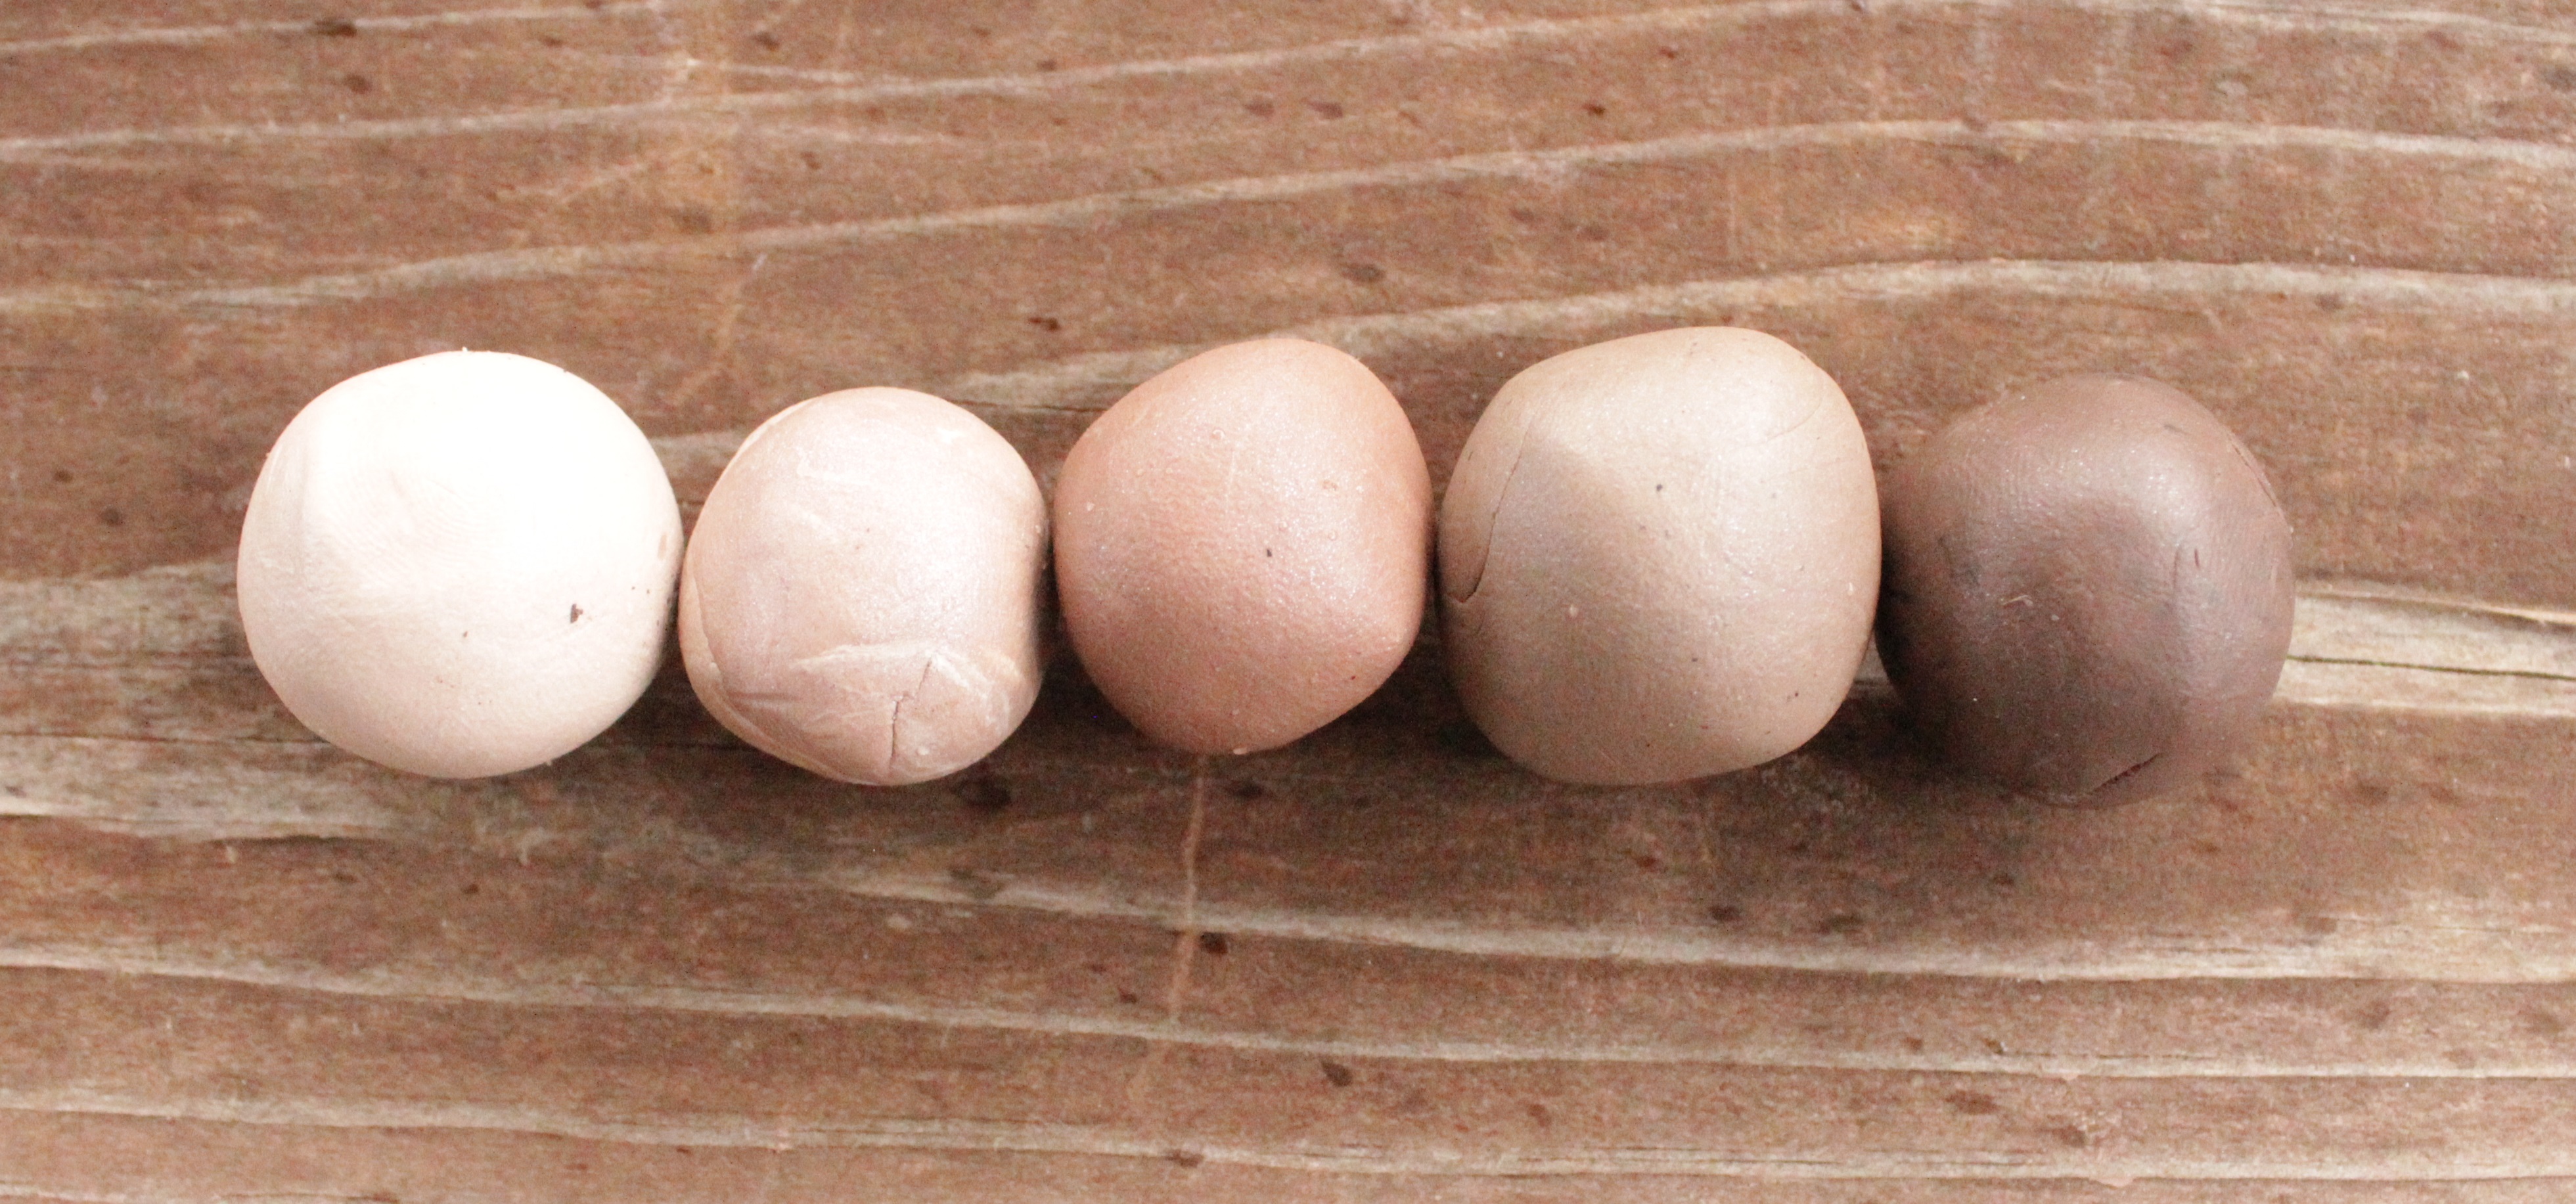
1. Polymer Clay in different shades, white, tan, brown, stone (This comes in different colors, but has little speckles to make it look like real rock): about $10.00
2. Sheet of thin board from craft store: $2.79
3. Brown acrylic craft paint: $1.79
4. White craft glue (Elmer’s style): $1.99
5. Patience: priceless
Total for project: $16.57

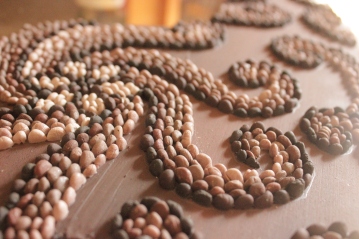
1) Start with different colors of polymer clay. I like to use some of the rock-effect clay to give each block a different look. Warm clay is stickier to work with, so may need to be thrown in the freezer for a few minutes to cool off.

Fairy garden path mosaic fairy house fairy garden beneath the ferns #beneaththeferns #fairygarden 3

2) Start rolling each color into the small “stones” that you will end up using. Remember, just like real rocks, each stone is going to be a different size and shape.

Fairy garden path mosaic fairy house fairy garden beneath the ferns #beneaththeferns #fairygarden 1

Fairy garden path mosaic fairy house fairy garden beneath the ferns #beneaththeferns #fairygarden 2

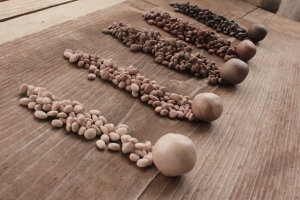
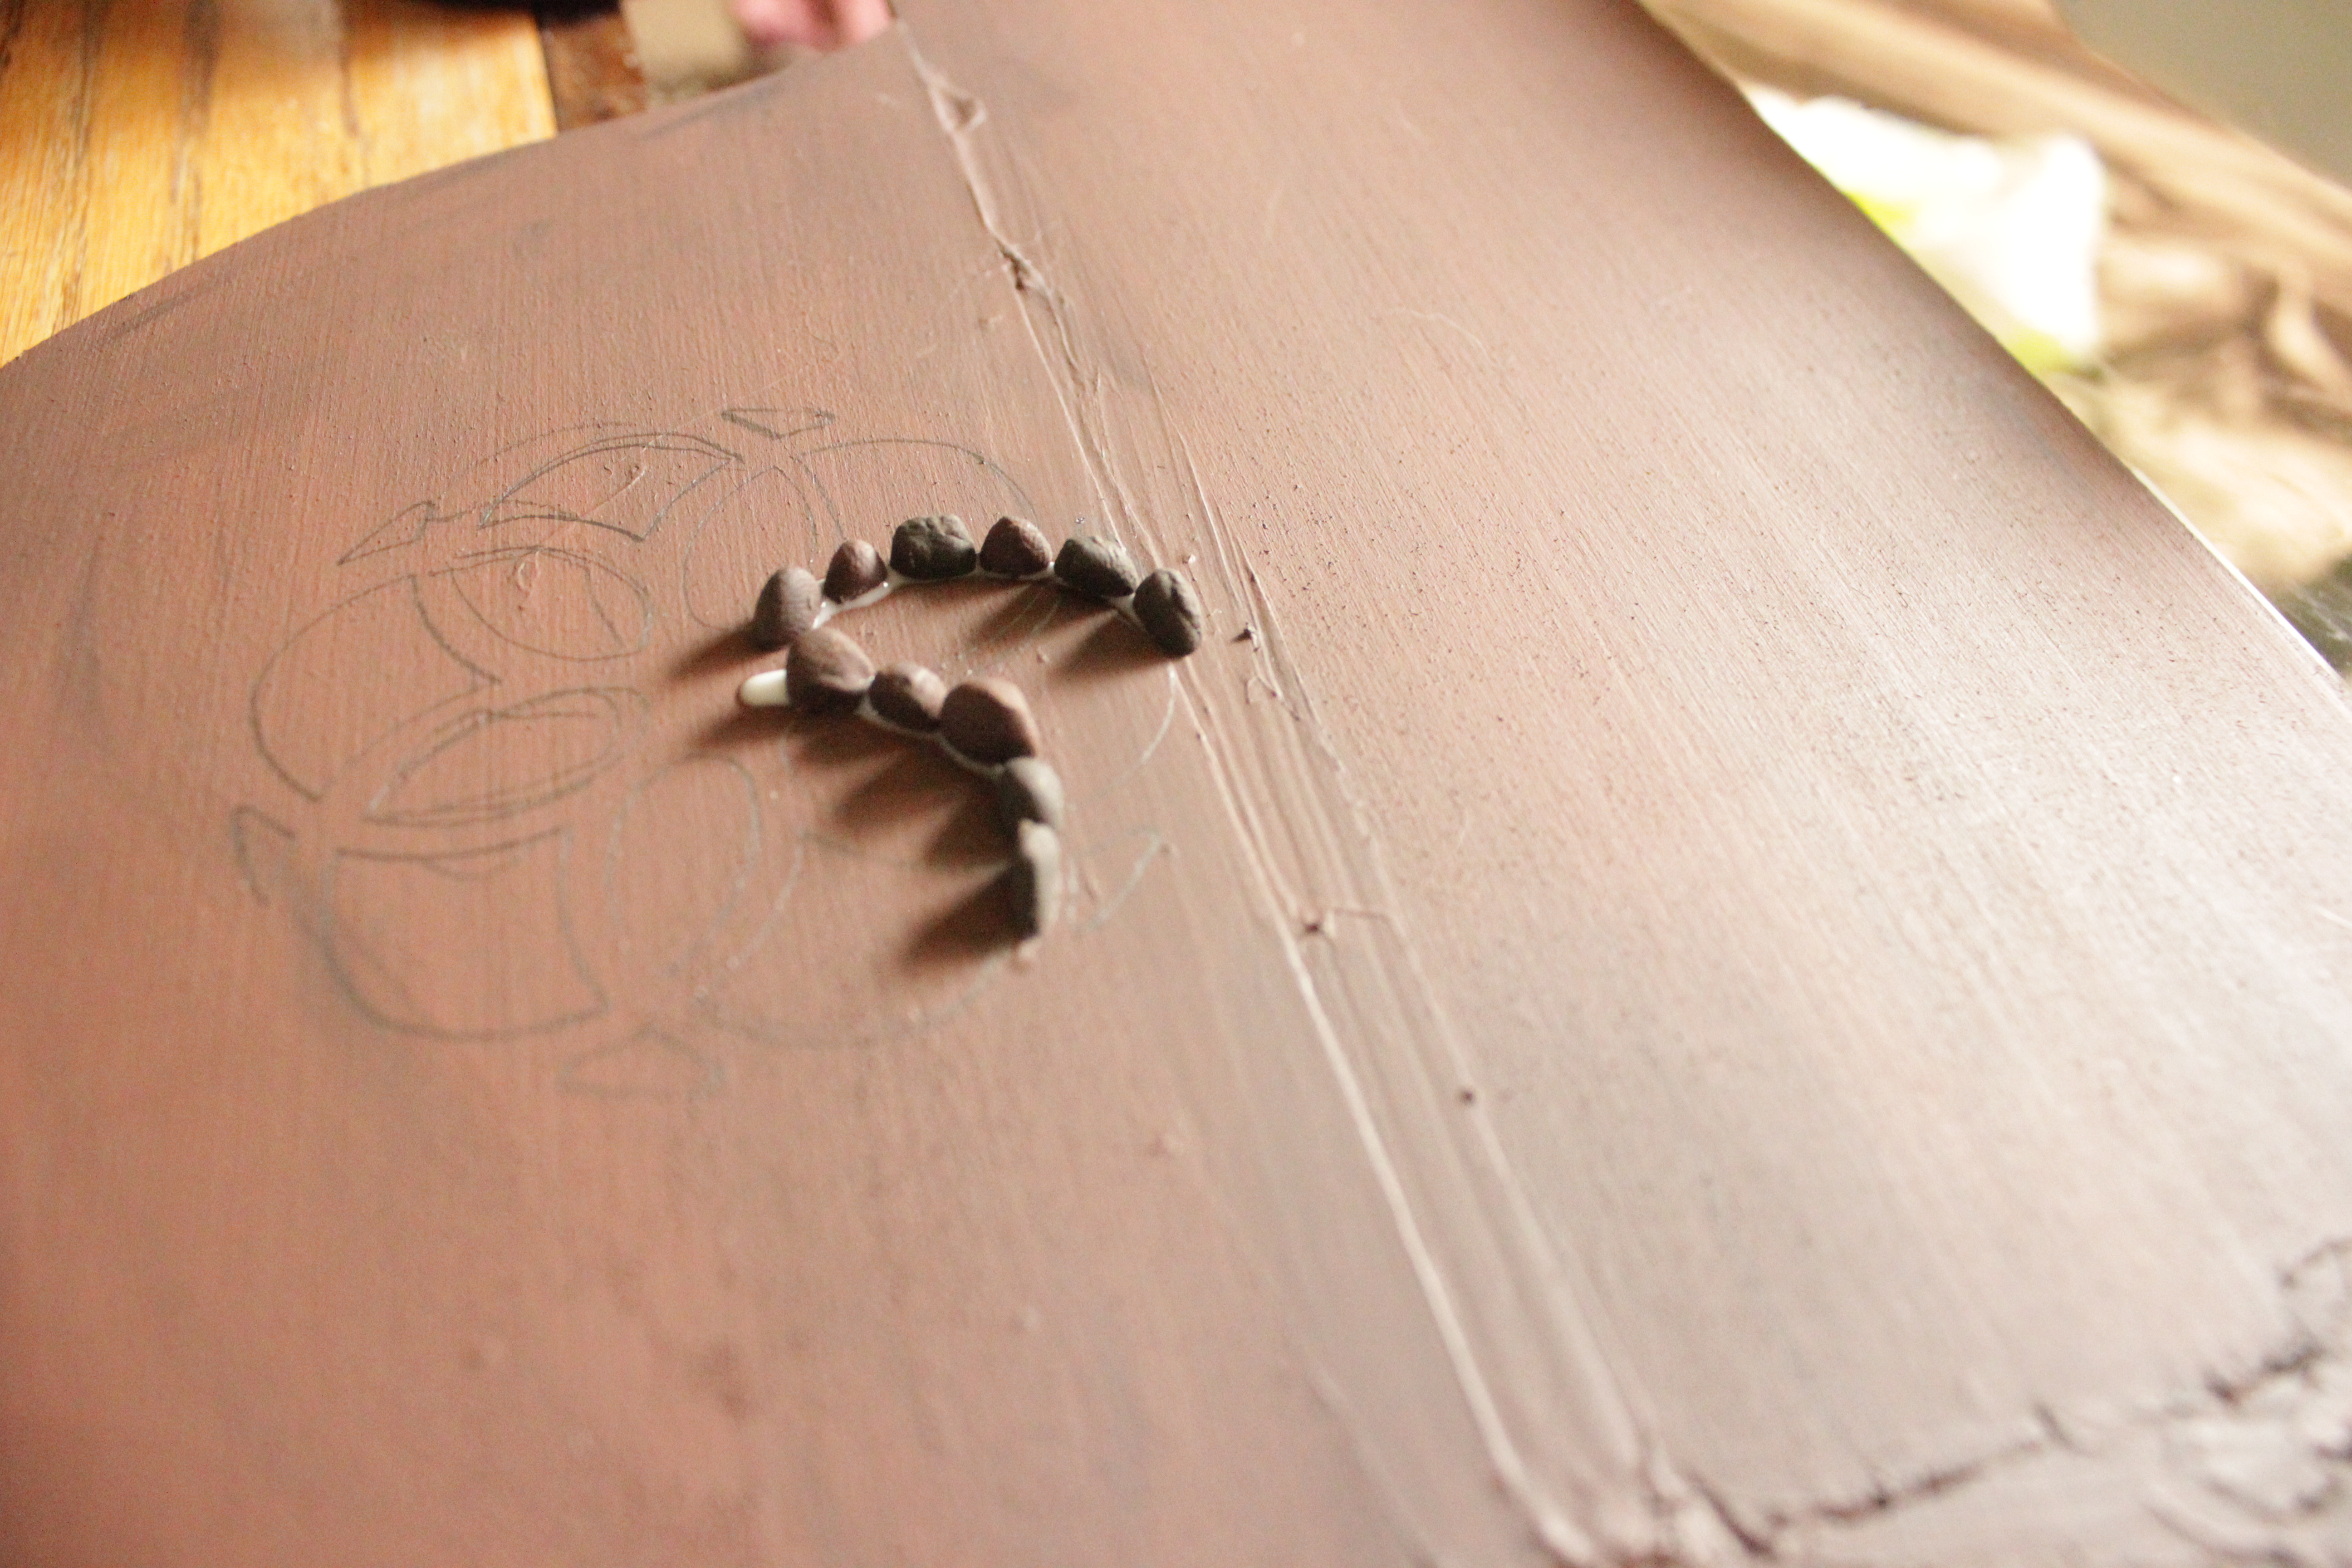
3) After you roll them out, flatten each piece, then cut them in half with a sharp blade. Putting them in the freezer for a few minutes helps them to stiffen up if they are too warm and pliable, which I really found happened at this point. Once they are cut in half, bake them according to the instructions on the package.

Fairy garden path mosaic fairy house fairy garden beneath the ferns #beneaththeferns #fairygarden 4

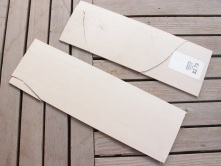
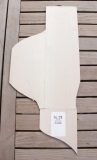
4) Cut the base piece to the size and shape you want. If you don’t have a saw, get a thin enough piece of wood, which can actually be cut with scissors. Then glue the pieces together, and you are ready to go. I wanted mine to be sturdy, so I glued additional braces on the bottom where the glued seams were.

Fairy garden path mosaic fairy house fairy garden beneath the ferns #beneaththeferns #fairygarden 5     Fairy garden path mosaic fairy house fairy garden beneath the ferns #beneaththeferns #fairygarden 6

5) Paint your board. I chose brown because that would be the color of the sand and dirt below the “rocks” if this were a real path. Then draw your design on with a pencil, or white colored pencil.

Fairy garden path mosaic fairy house fairy garden beneath the ferns #beneaththeferns #fairygarden 7

6) Let the fun begin! Glue each “stone” on one at a time according to your design. I recommend sitting down with a good movie and getting comfortable. You’re going to be here for a while. (Might I also add that I have a two year old daughter who was out of town when I made this project….no way could I have ever finished it with her tiny hands “helping” me! ♥)

Fairy garden path mosaic fairy house fairy garden beneath the ferns #beneaththeferns #fairygarden 9

Fairy garden path mosaic fairy house fairy garden beneath the ferns #beneaththeferns #fairygarden 9

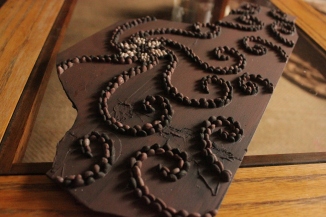
I love seeing the fingerprints on each “stone” below. It shows that a human made each and every one of them!

Fairy garden path mosaic fairy house fairy garden beneath the ferns #beneaththeferns #fairygarden 11

Fairy garden path mosaic fairy house fairy garden beneath the ferns #beneaththeferns #fairygarden 10  

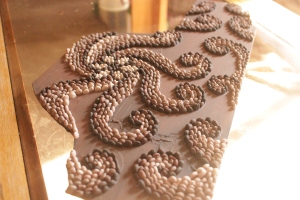
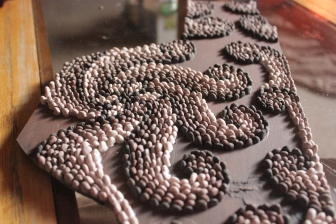
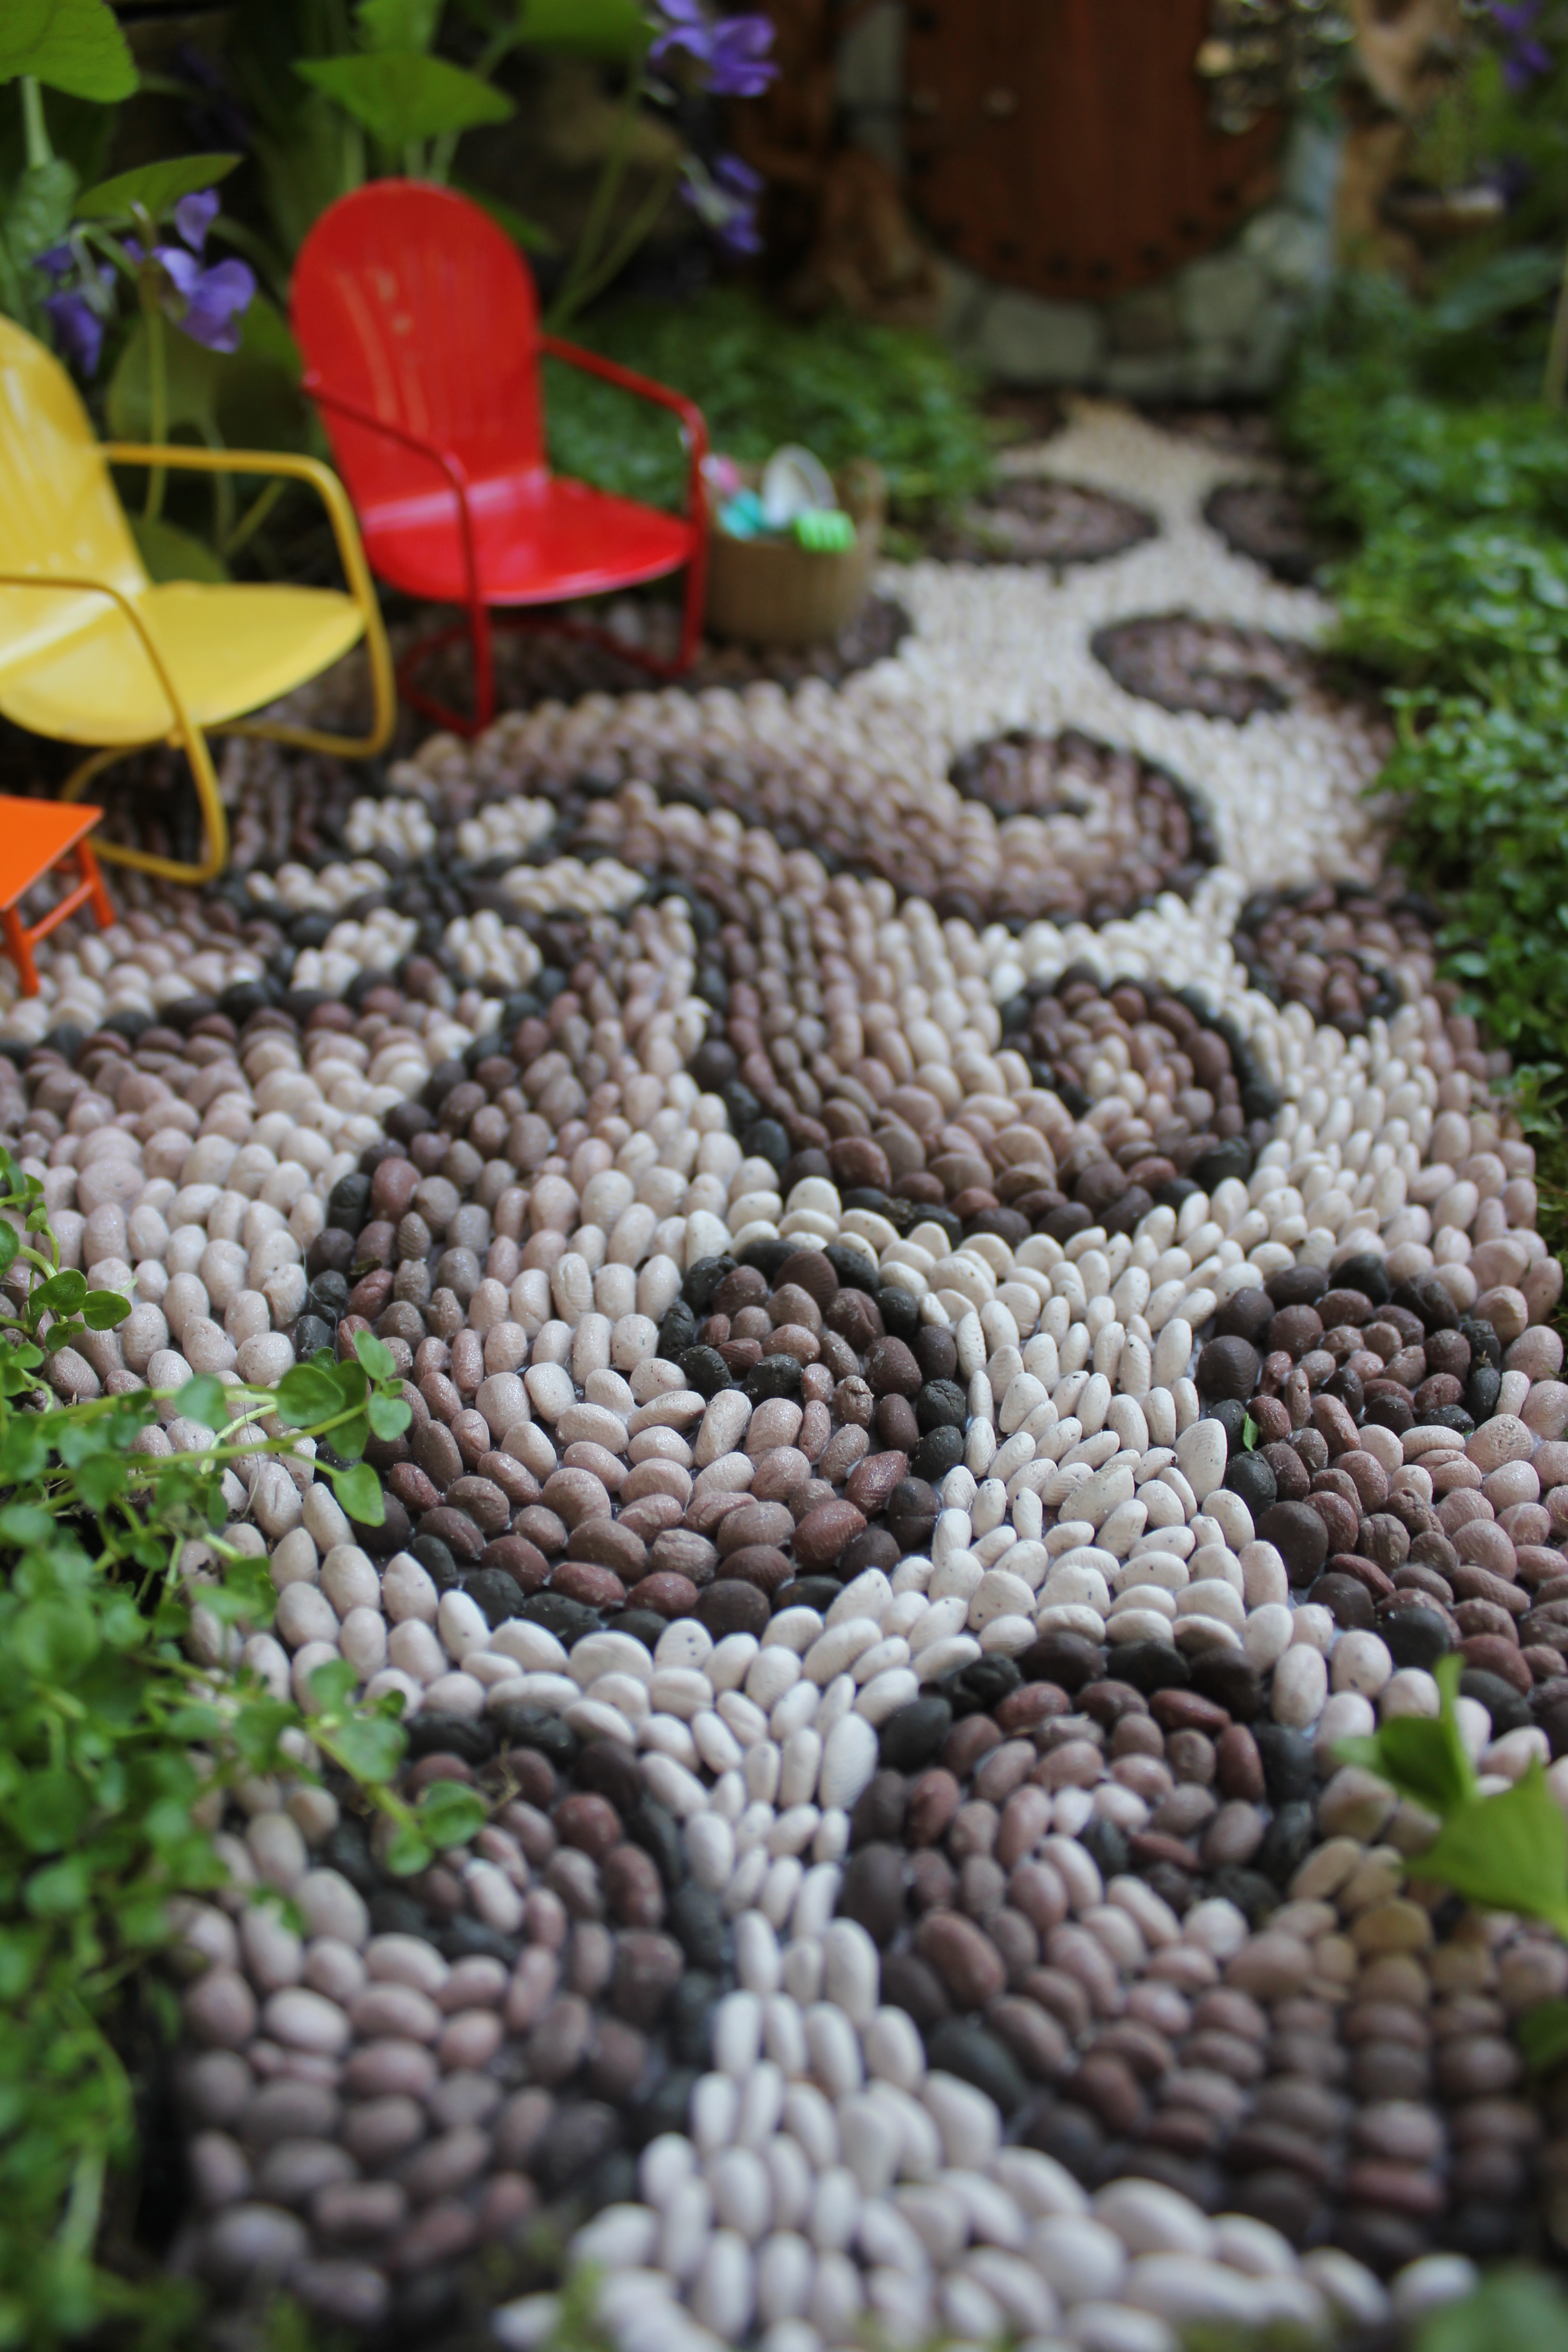
Getting close to being done, and neat to see the design taking form! (I’m on my third movie by now…)

Fairy garden path mosaic fairy house fairy garden beneath the ferns #beneaththeferns #fairygarden 12

Fairy garden path mosaic fairy house fairy garden beneath the ferns #beneaththeferns #fairygarden 13

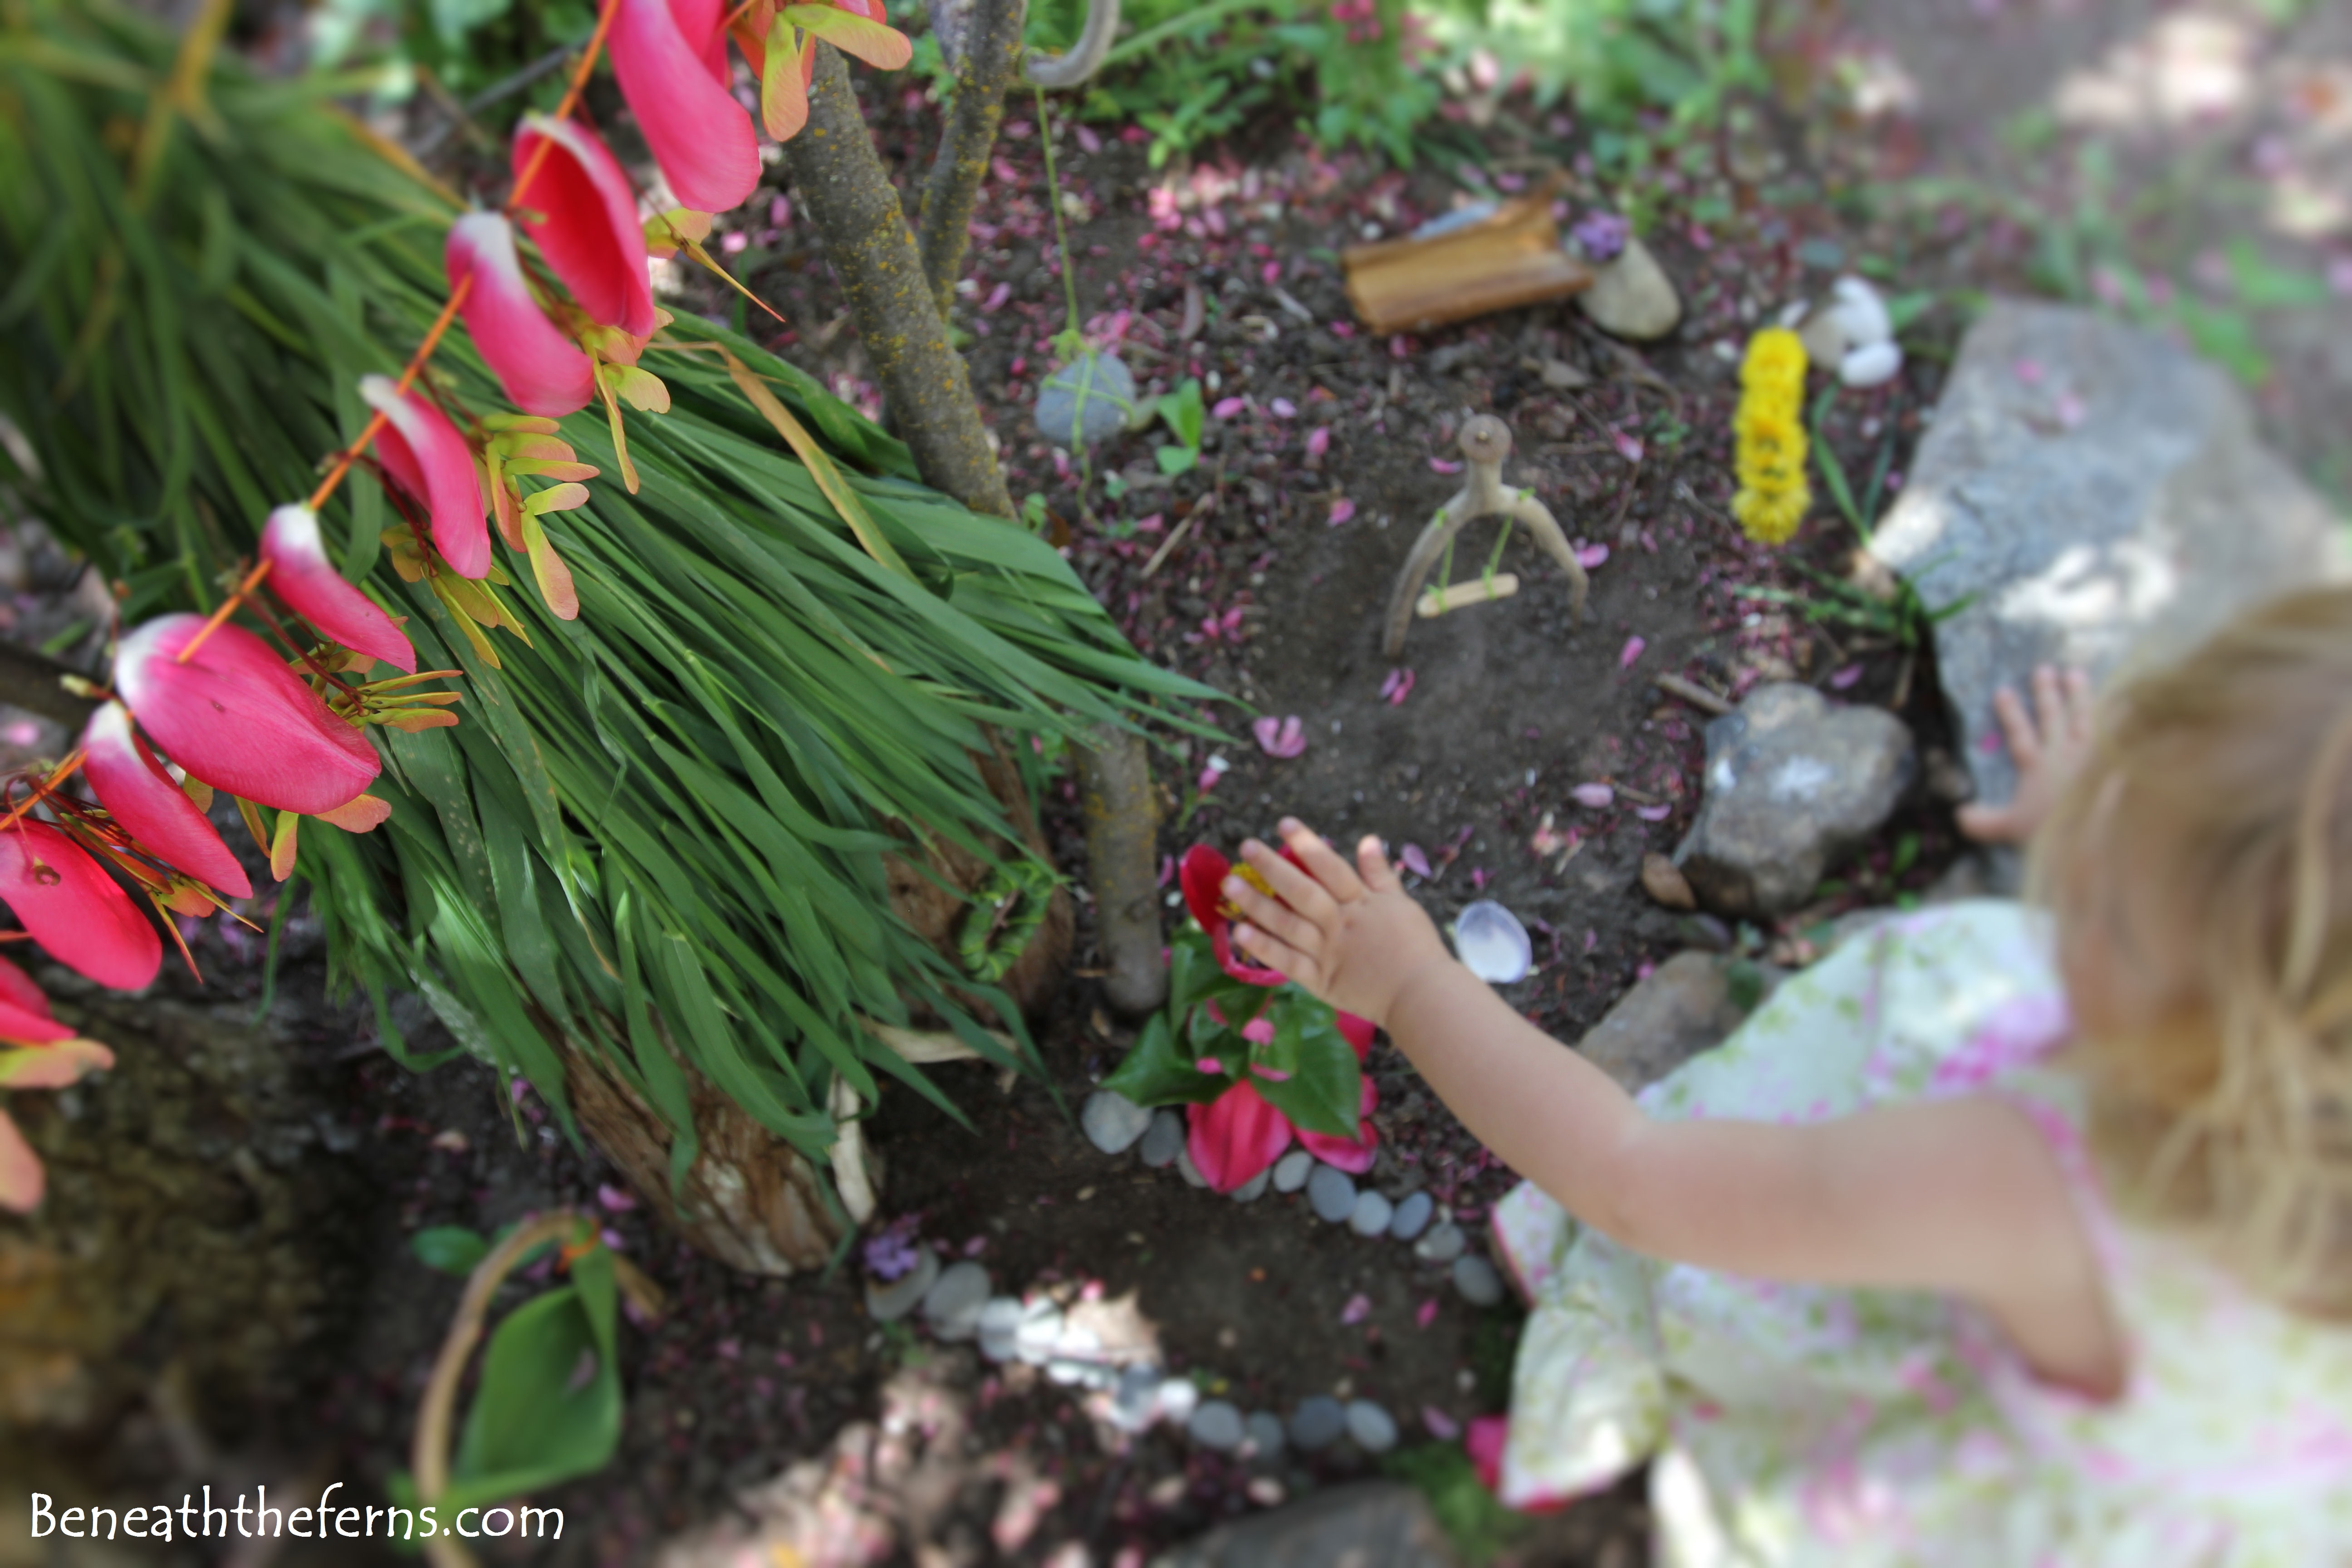
Now it’s time to do some landscaping around the path to see if it will fit or not…

Fairy house fairy garden miniatures at beneaththeferns.w... #Fairyhouse #fairygarden #miniature #beneaththeferns 8

Fairy house fairy garden miniatures at beneaththeferns.w... #Fairyhouse #fairygarden #miniature #beneaththeferns

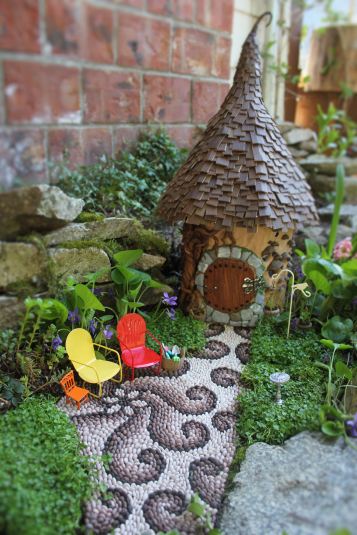
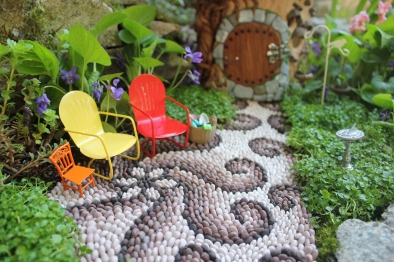
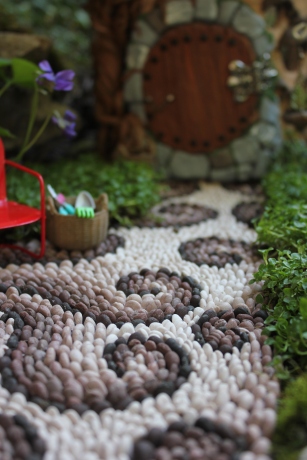
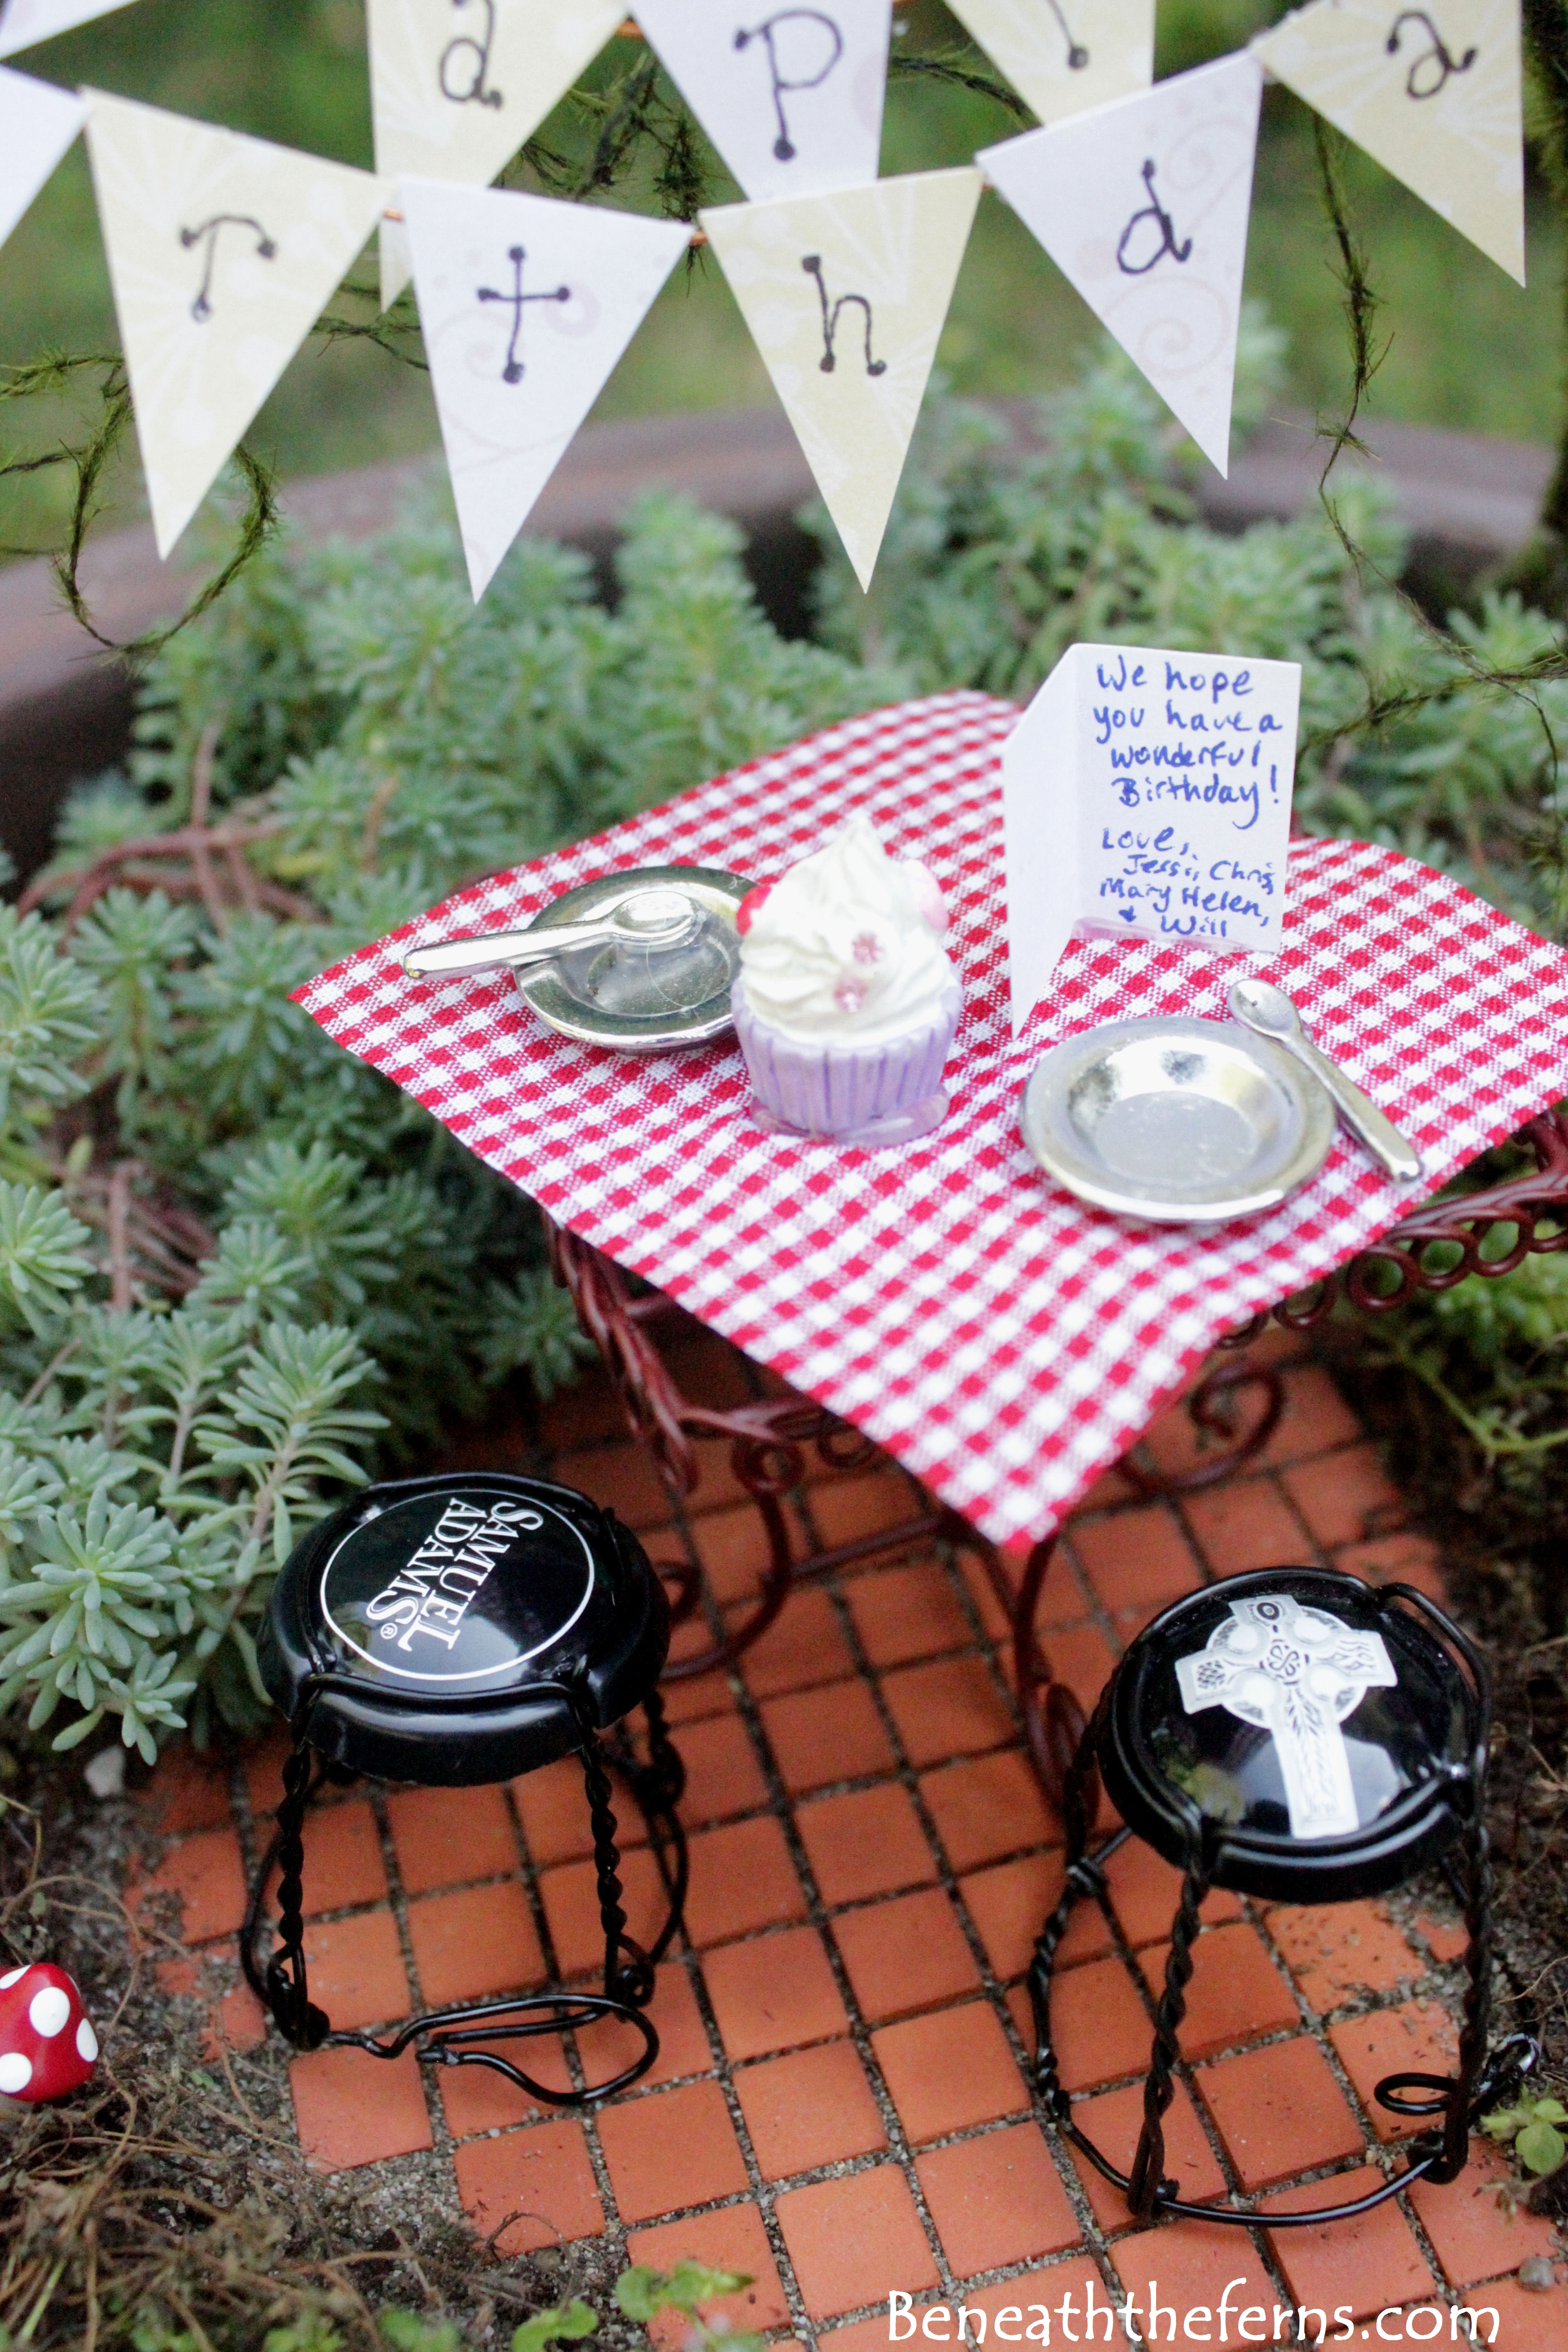
I landscaped with some succulents and violets that were already well established, then added some Corsican mint. I made a sitting area where mom, dad, and little one could sit and take a break after working hard in the garden 🙂

Fairy garden lawn chairs Fairy house miniatures at beneaththeferns.w... #Fairyhouse #fairygarden #miniature #beneaththeferns

Tools nicely stored…
Fairy house fairy garden miniatures at beneaththeferns.w... #Fairyhouse #fairygarden #miniature #beneaththeferns 7

Fairy house fairy garden miniatures at beneaththeferns.w... #Fairyhouse #fairygarden #miniature #beneaththeferns 3s

Fairy garden path mosaic fairy house fairy garden beneath the ferns #beneaththeferns #fairygarden 2

Fairy garden path mosaic fairy house fairy garden beneath the ferns #beneaththeferns #fairygarden 1

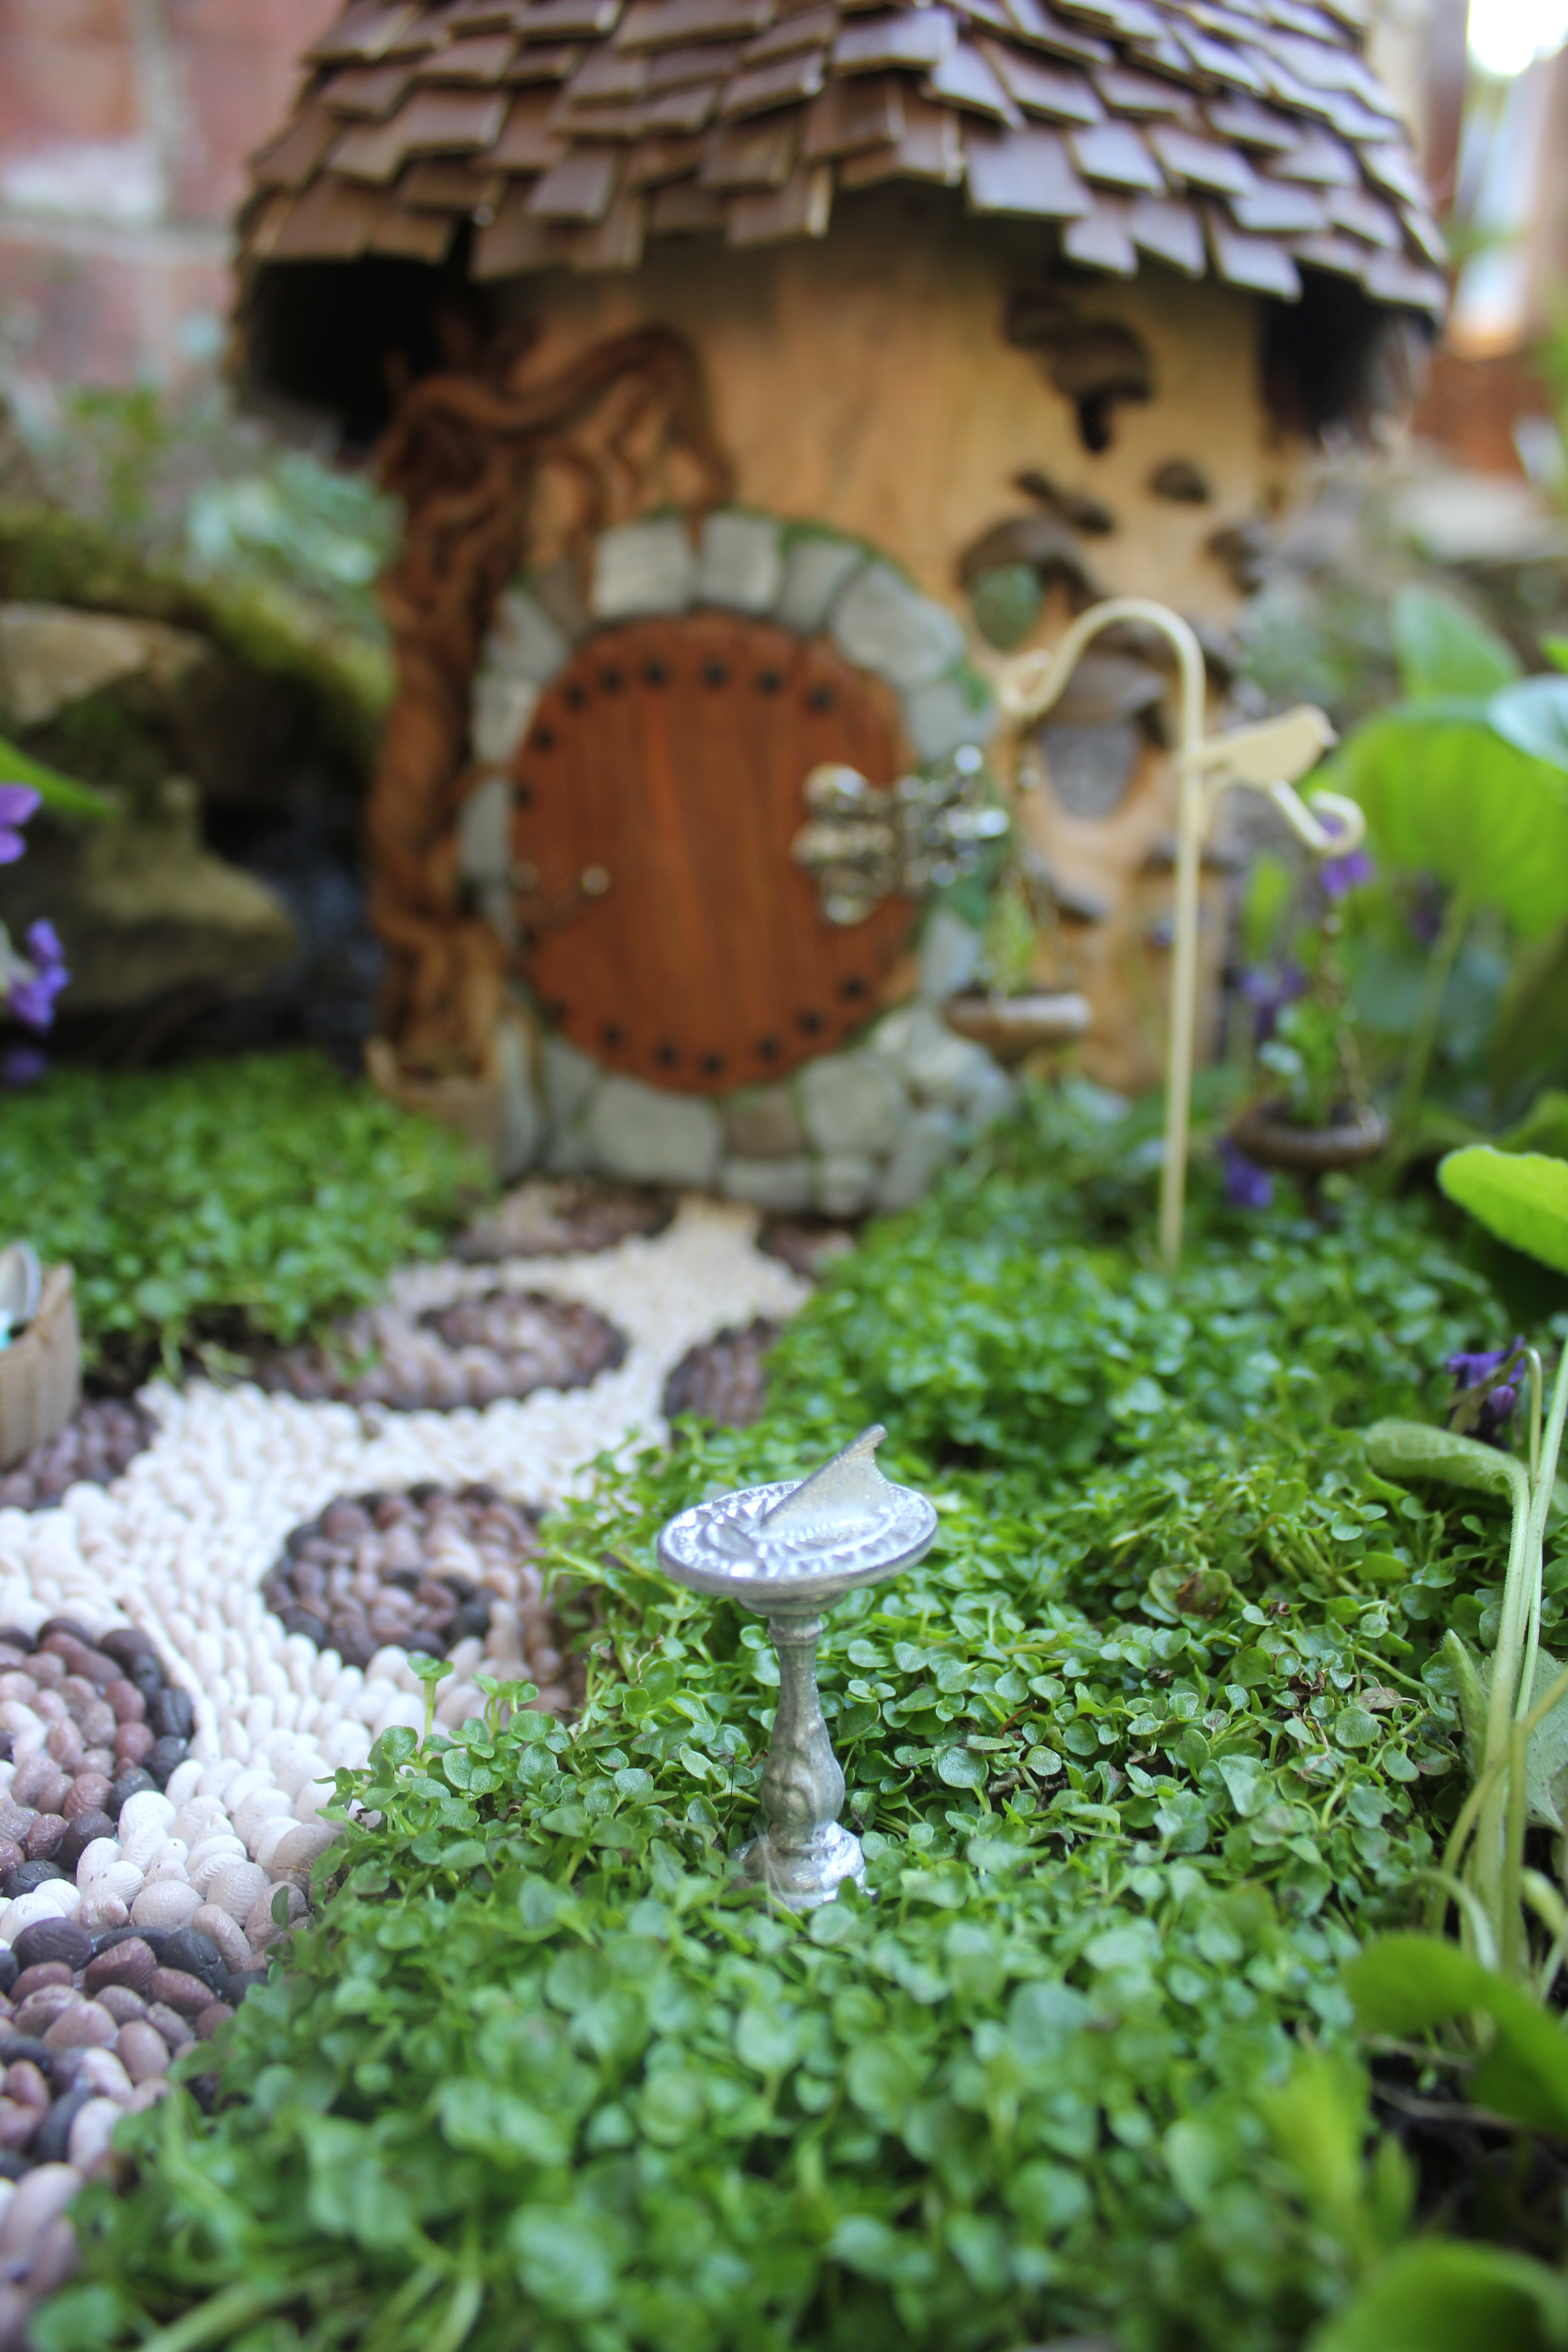
A little sun dial to tell when lunch is.
Fairy house fairy garden miniatures at beneaththeferns.w... #Fairyhouse #fairygarden #miniature #beneaththeferns 3

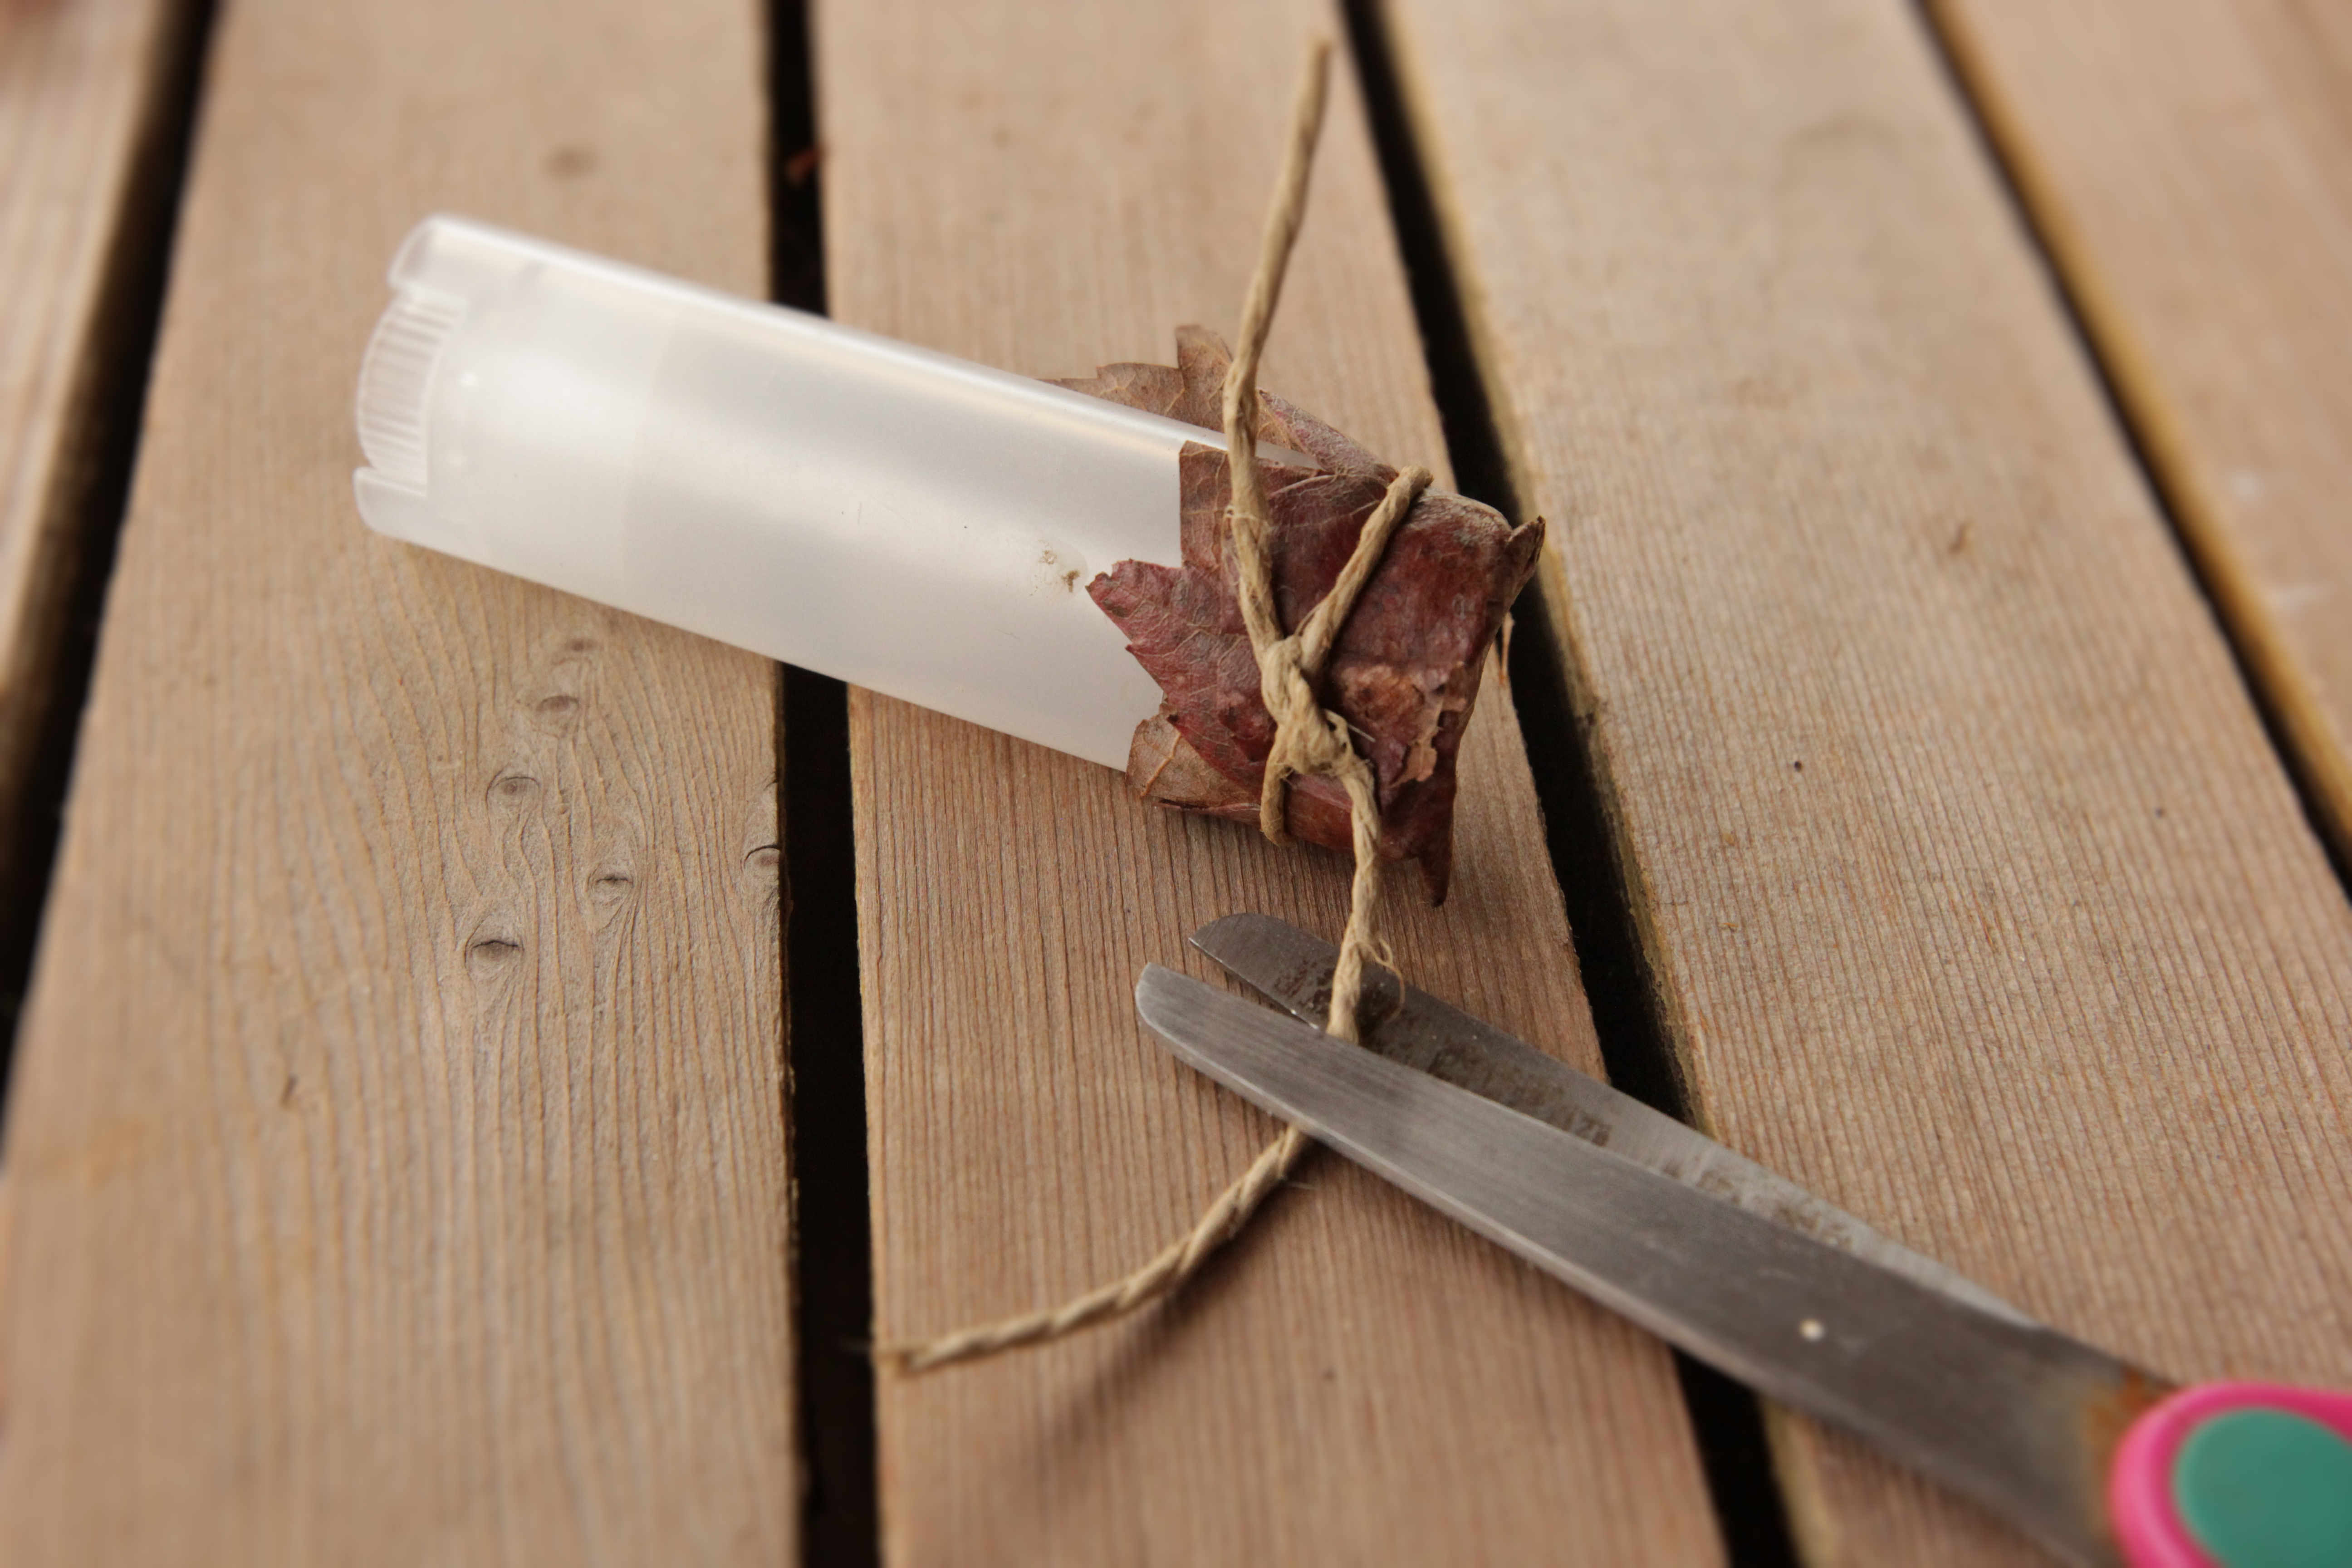
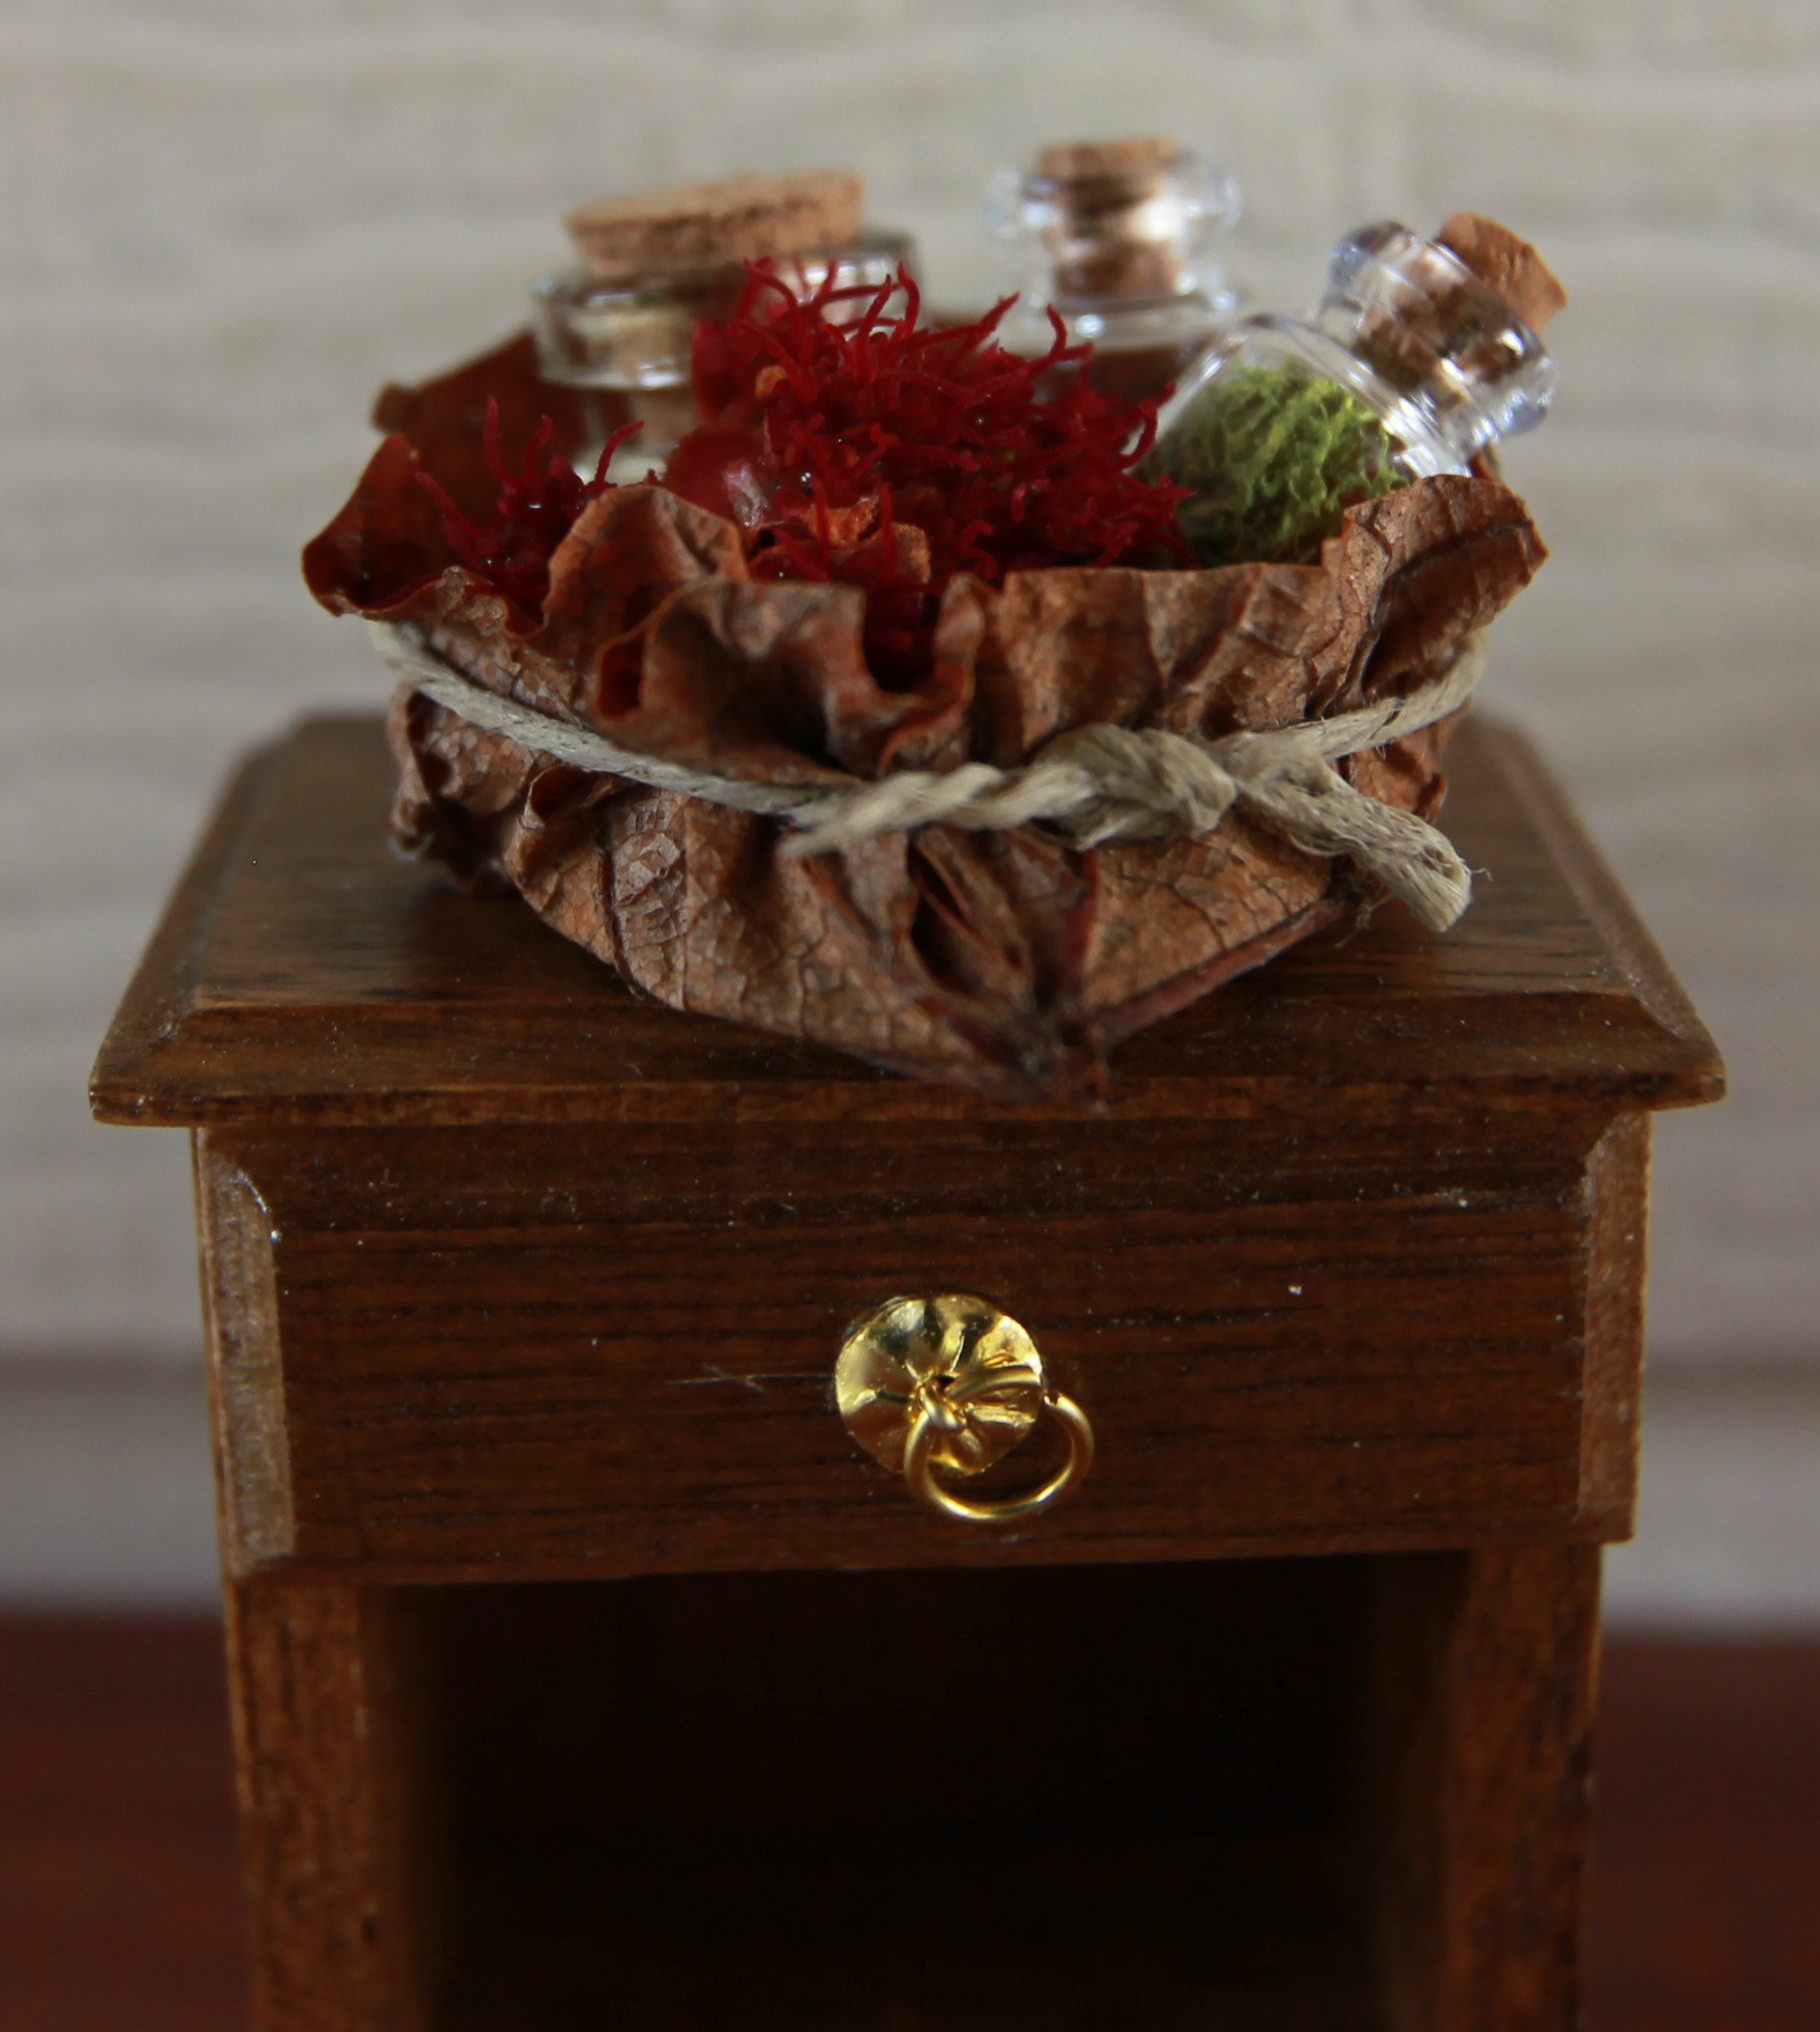
A basket of seeds to plant.
Fairy house fairy garden miniatures at beneaththeferns.w... #Fairyhouse #fairygarden #miniature #beneaththeferns 9

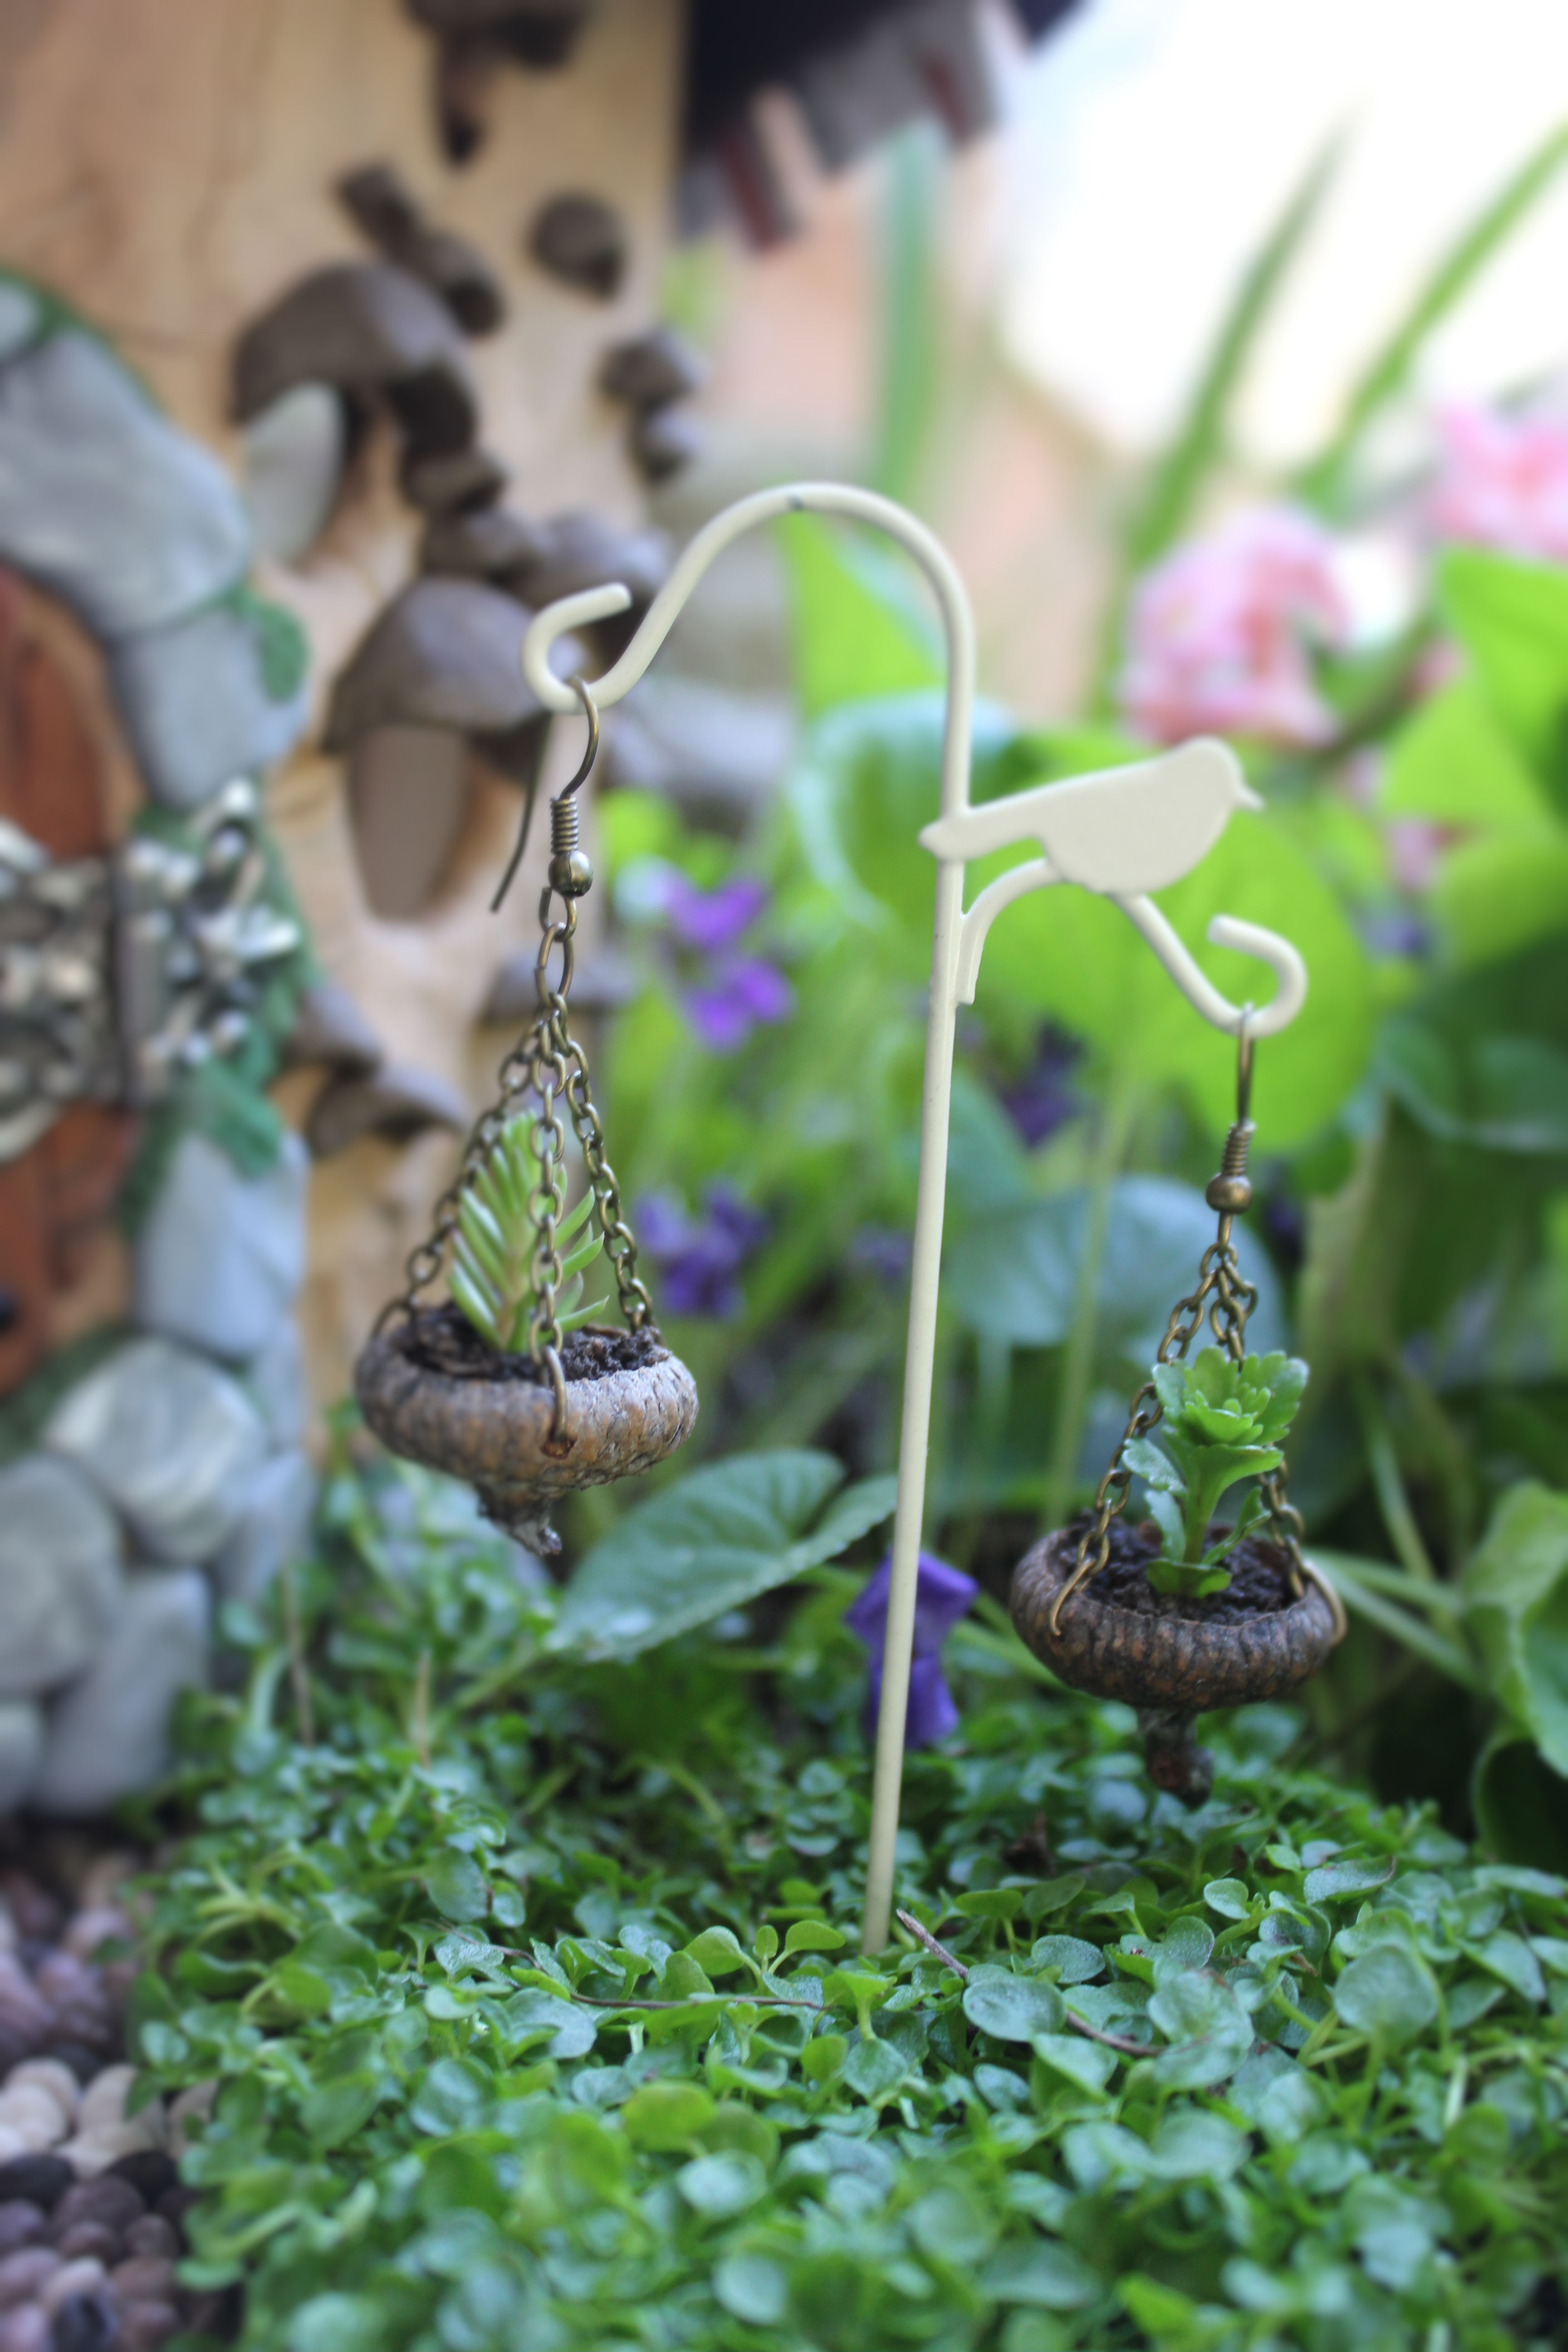
I made hanging baskets from acorn caps and planted little succulents inside.
Fairy house fairy garden miniatures at beneaththeferns.w... #Fairyhouse #fairygarden #miniature #beneaththeferns 4

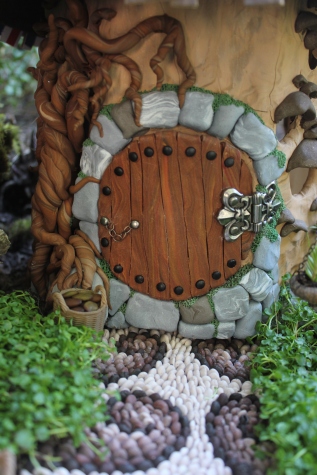
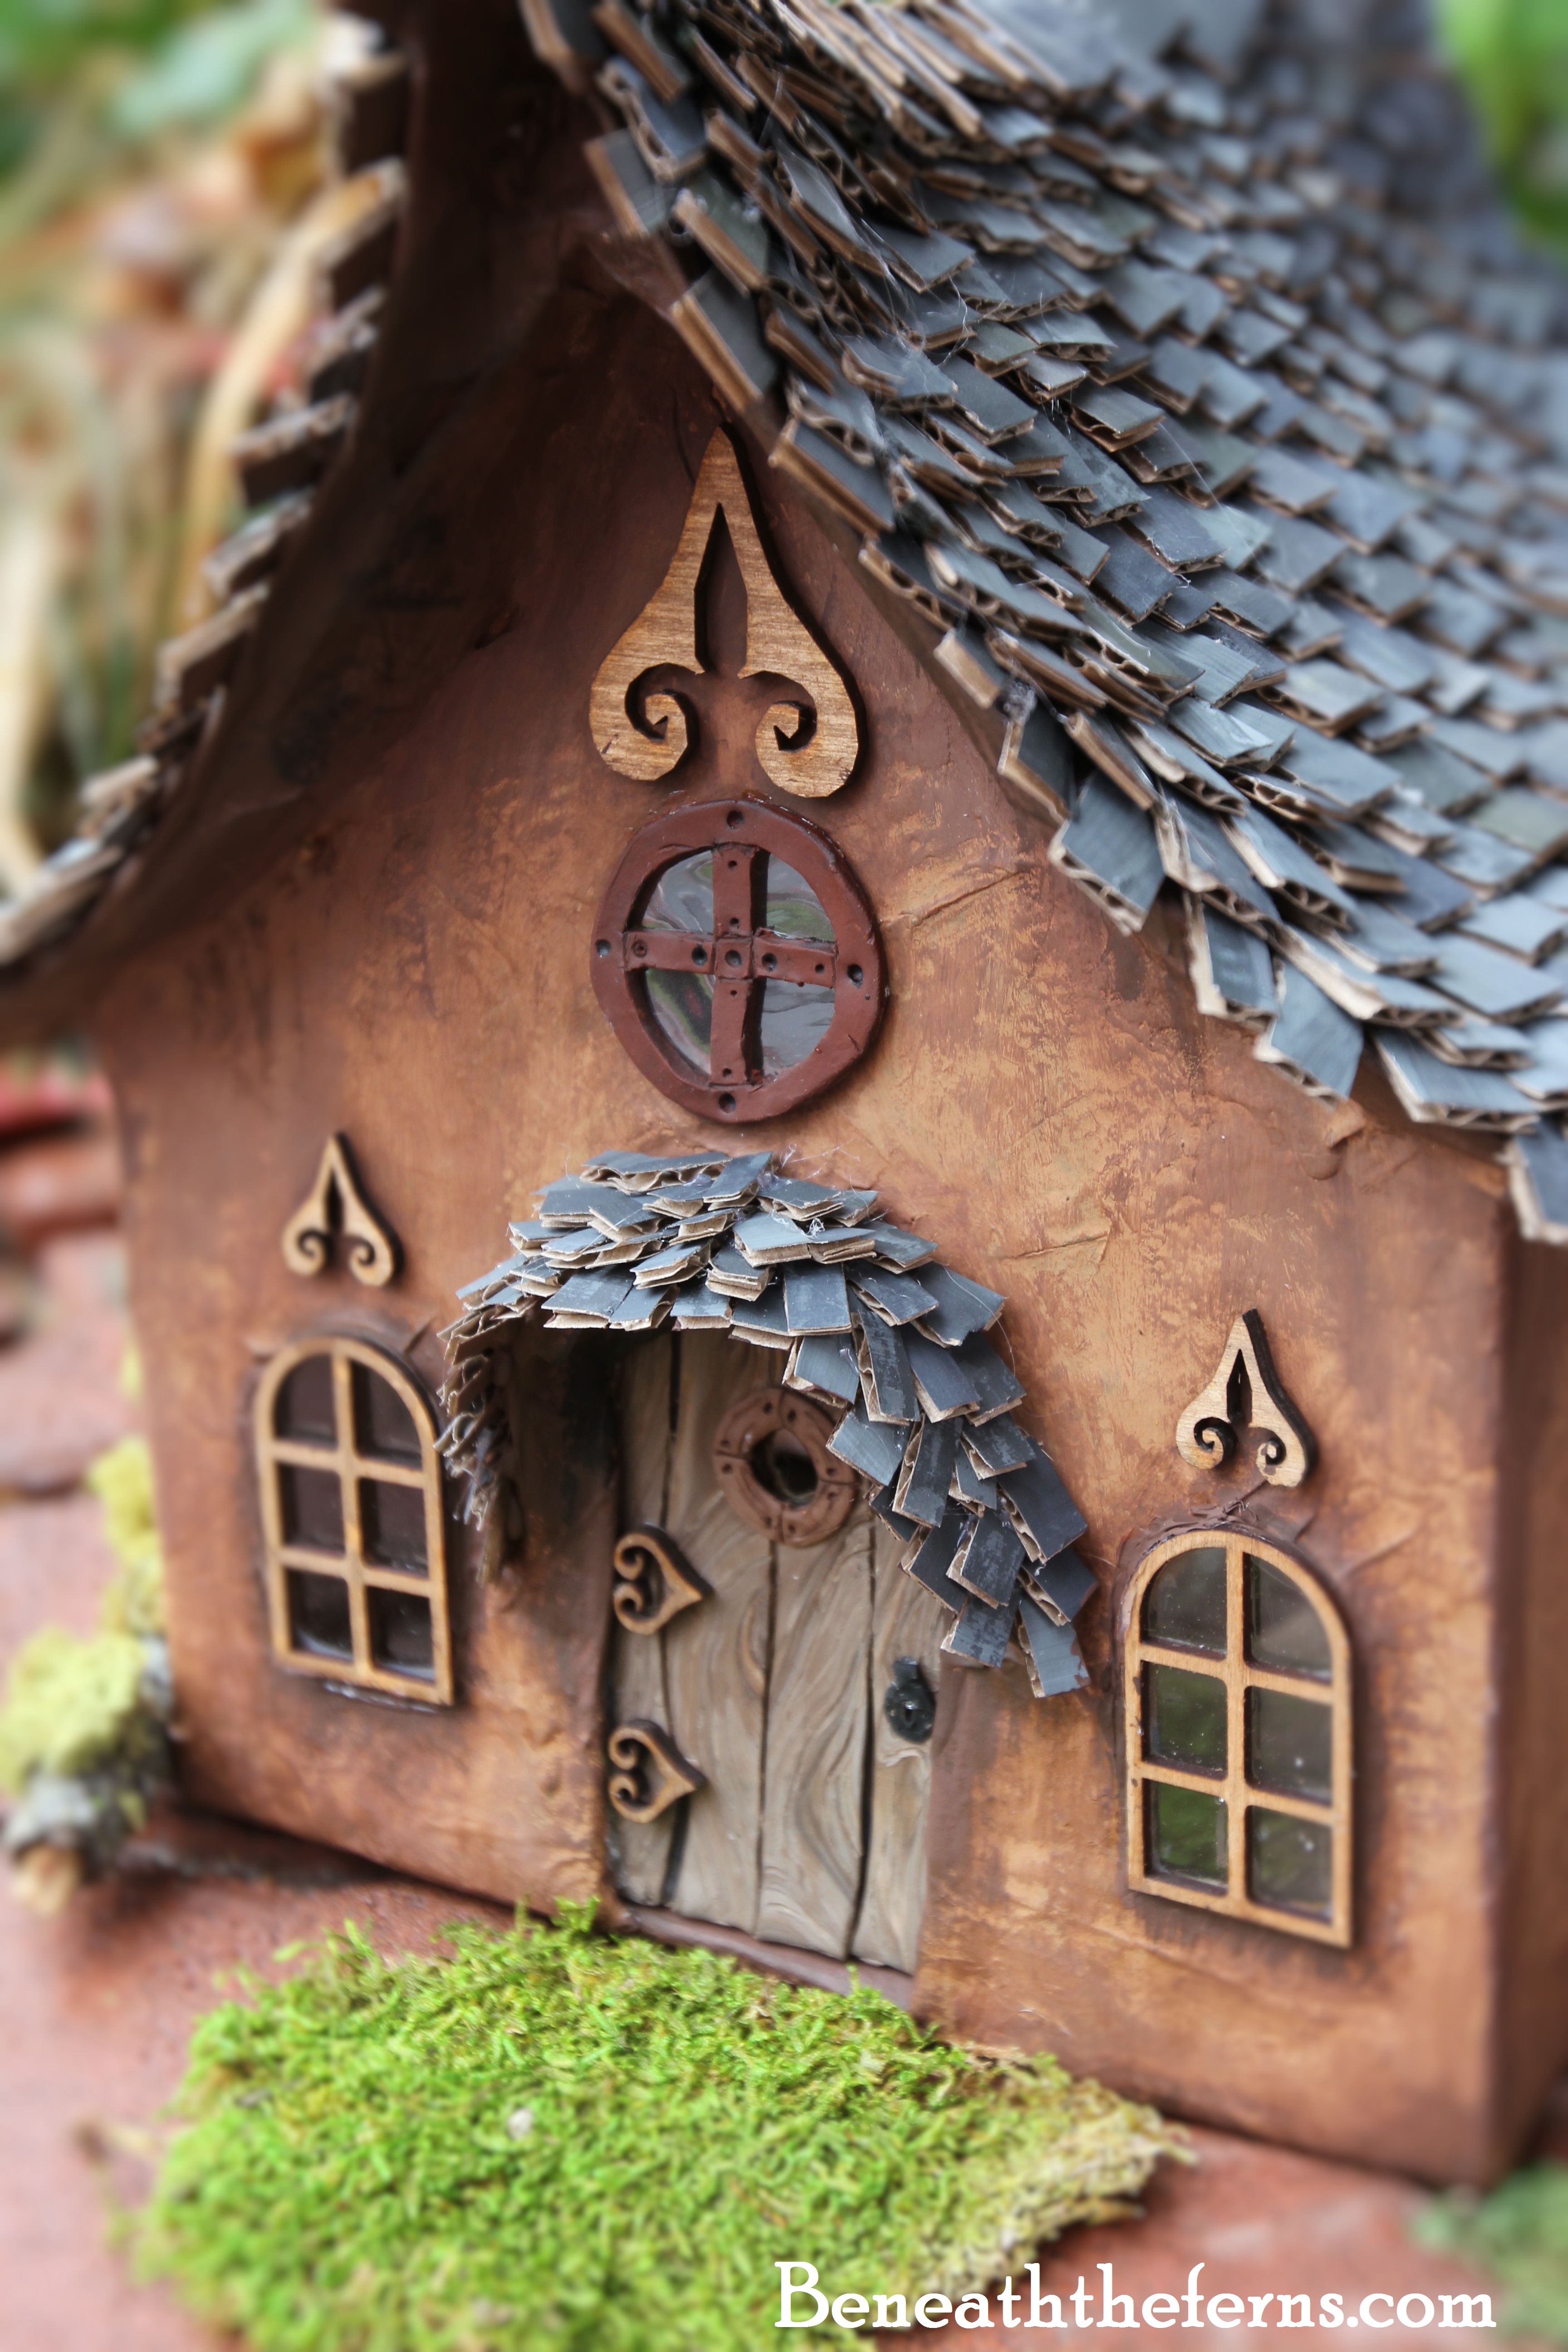
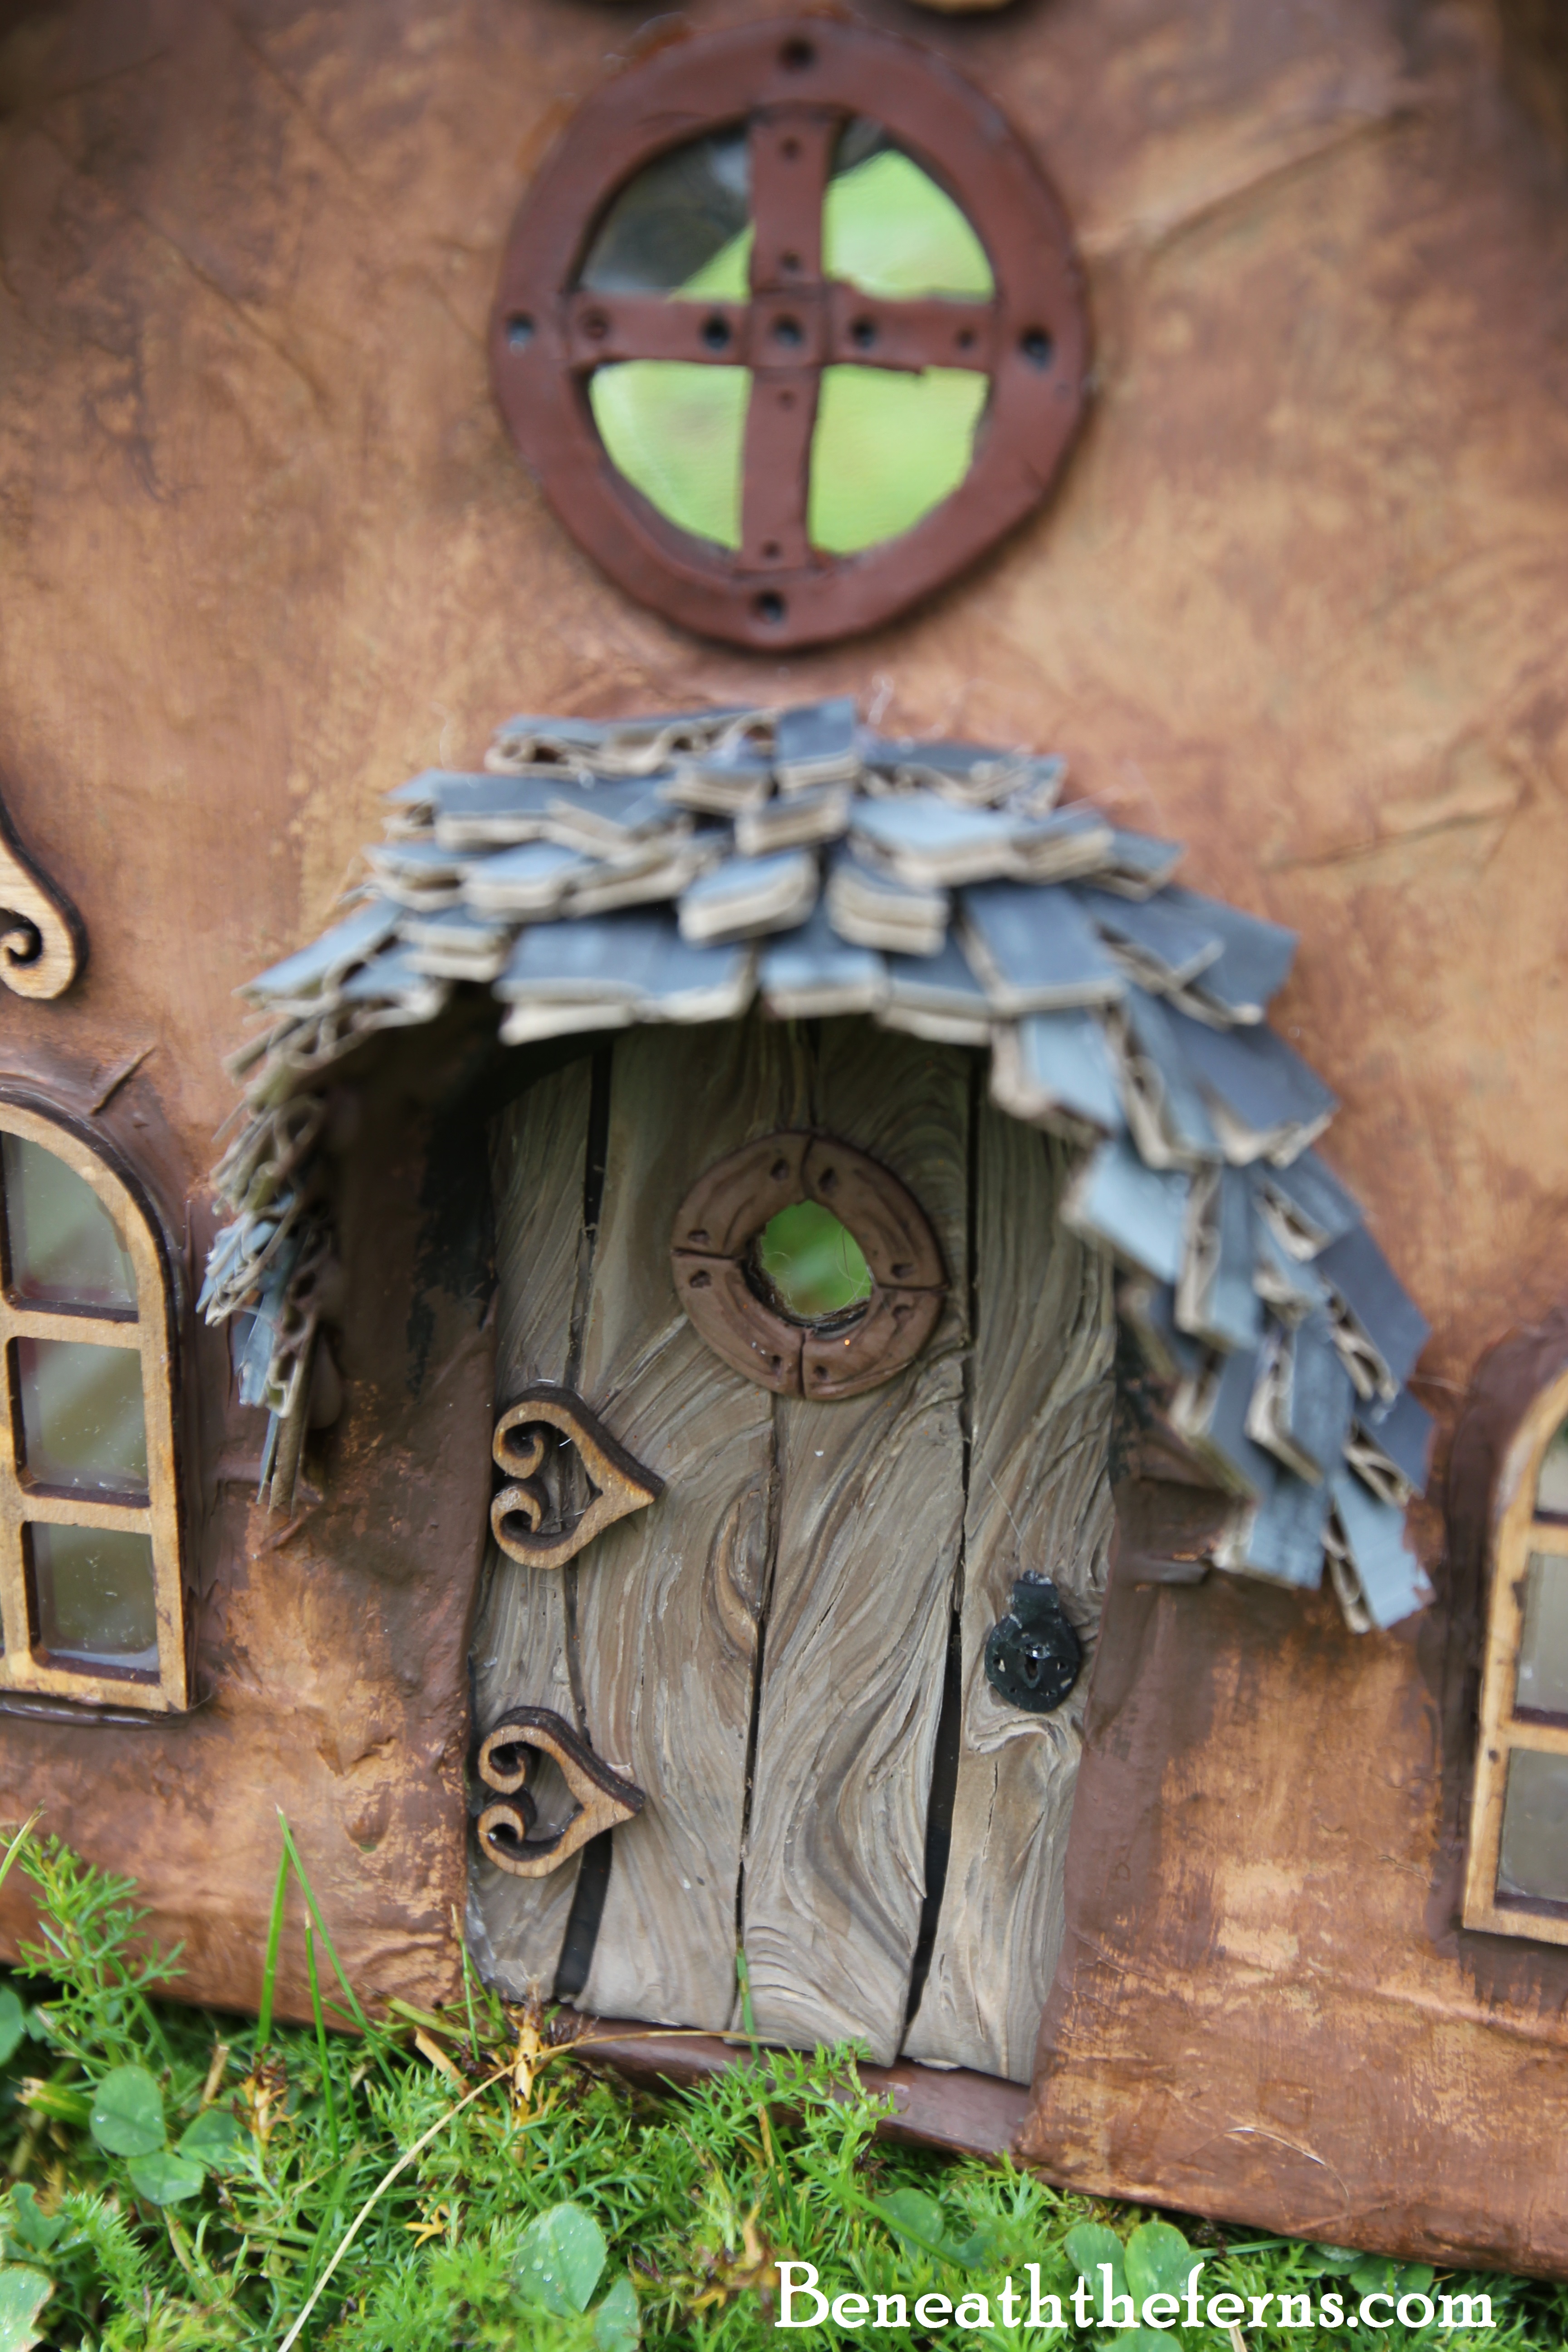
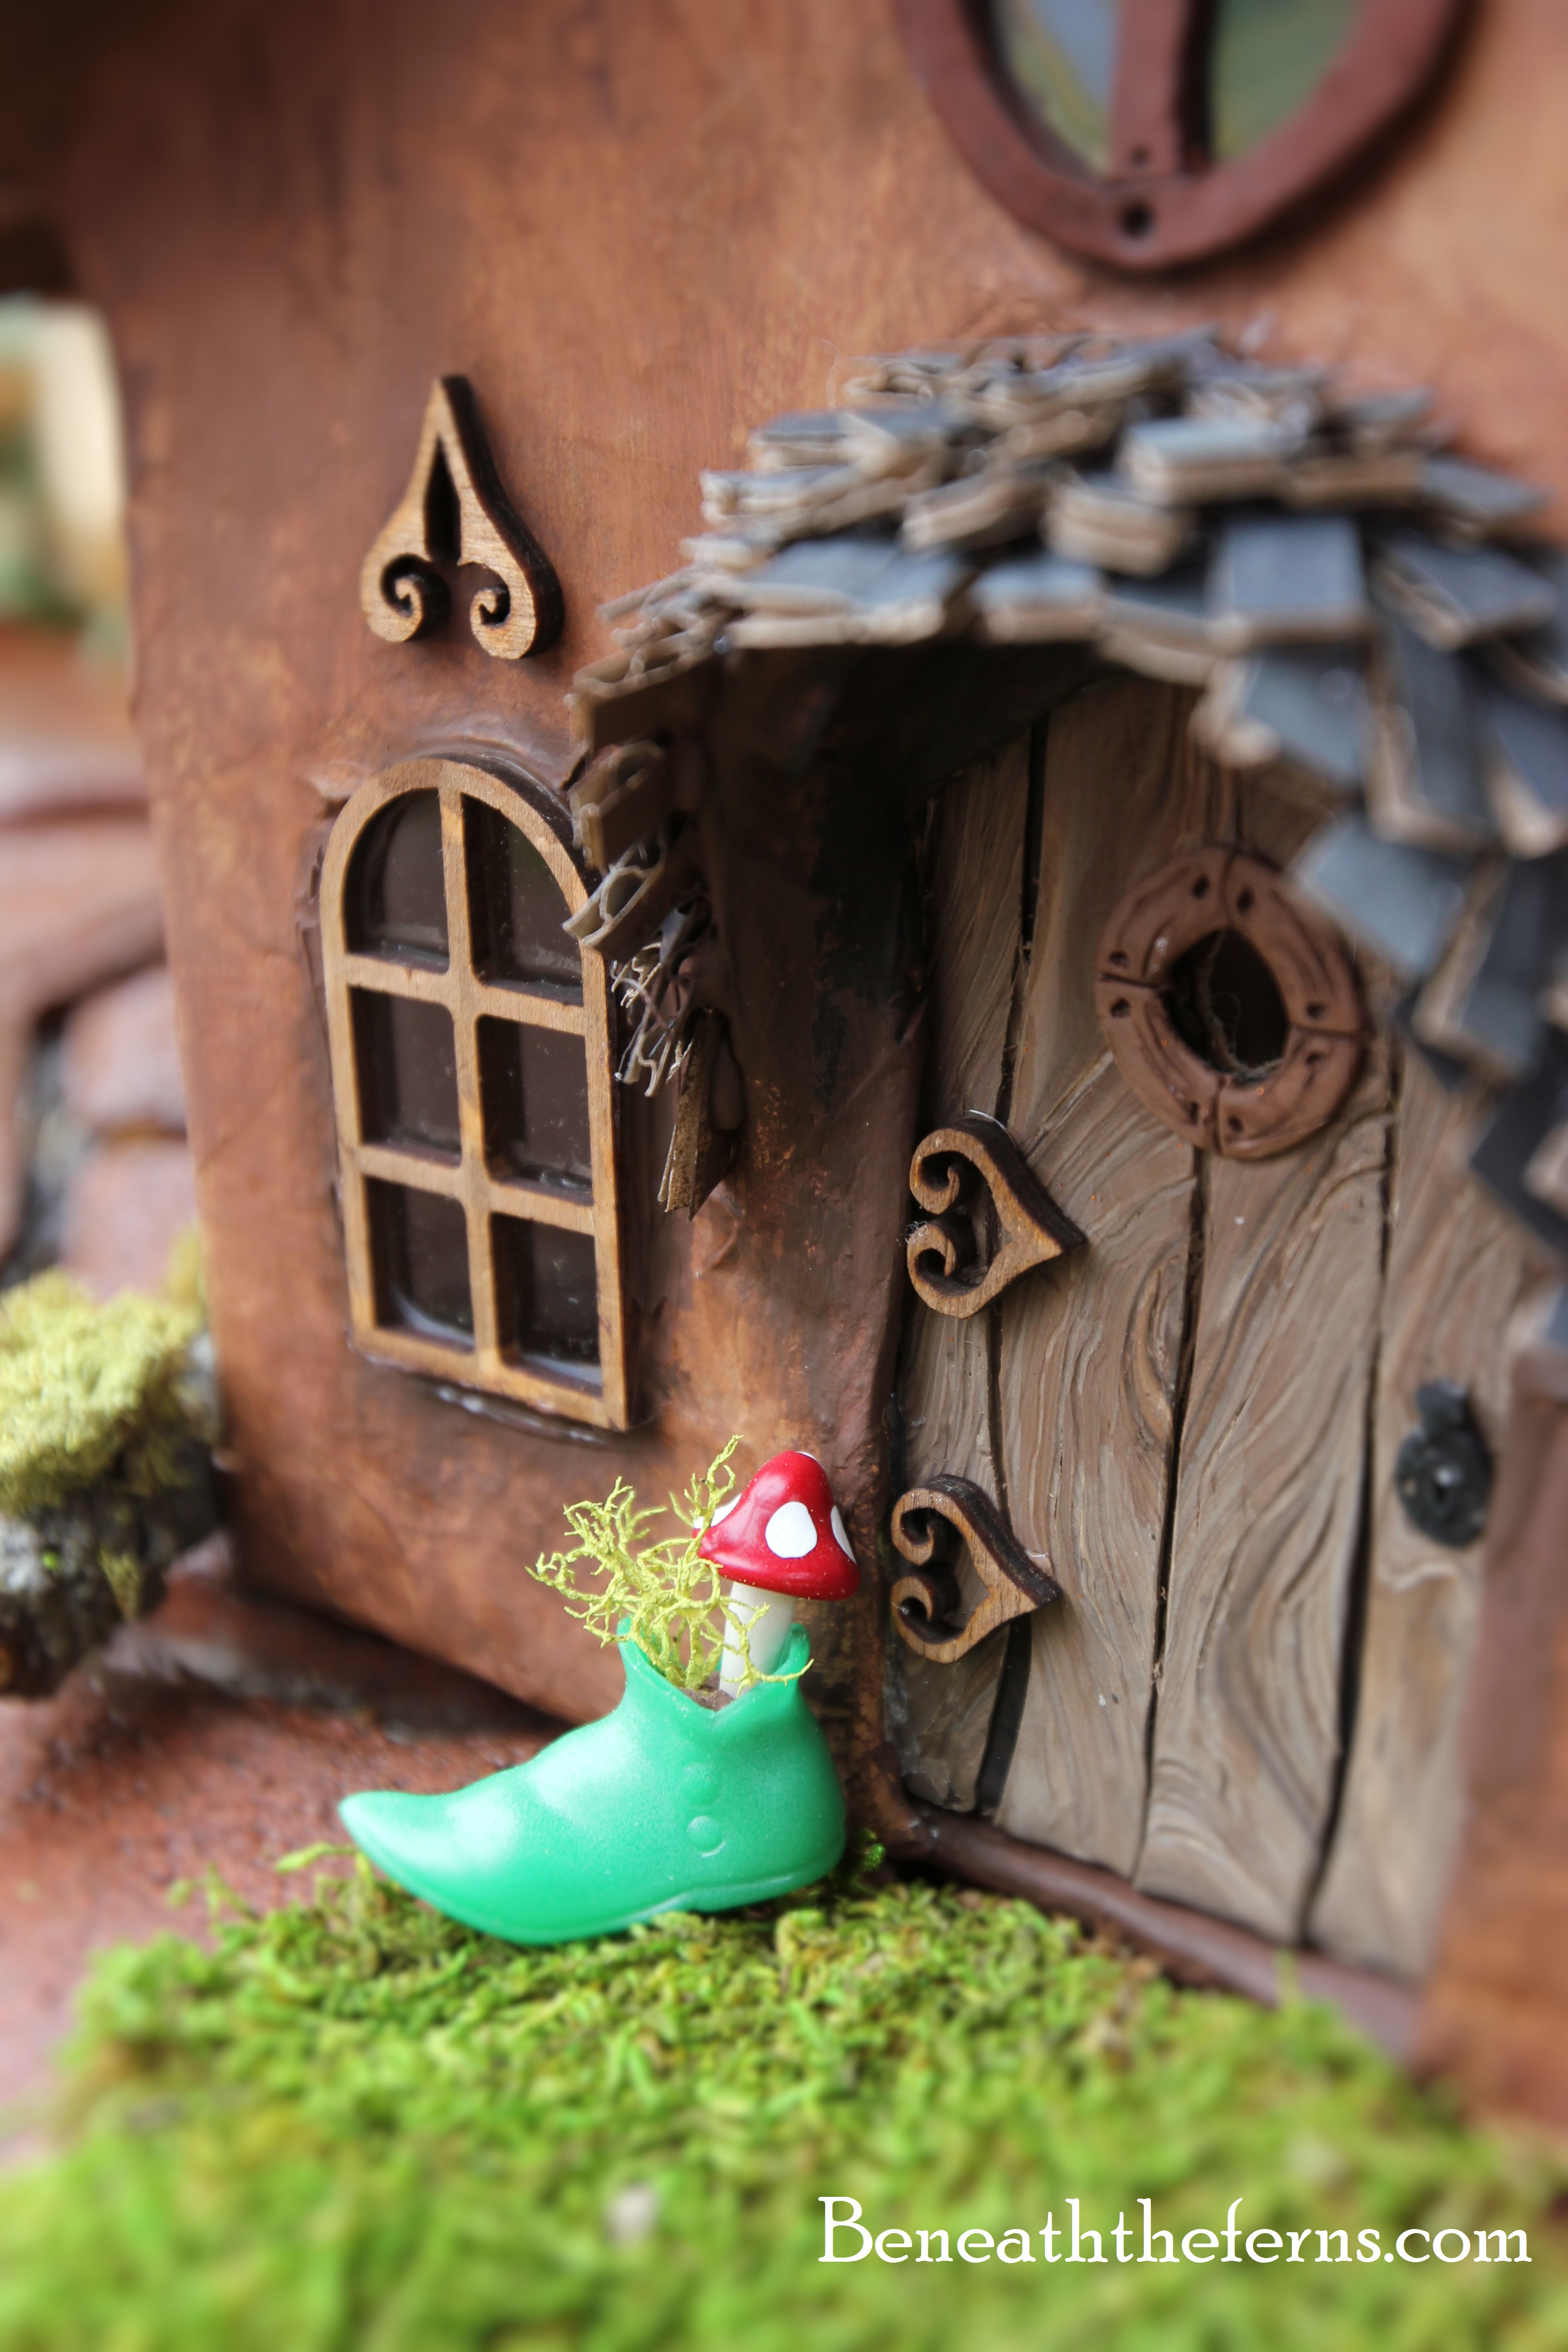
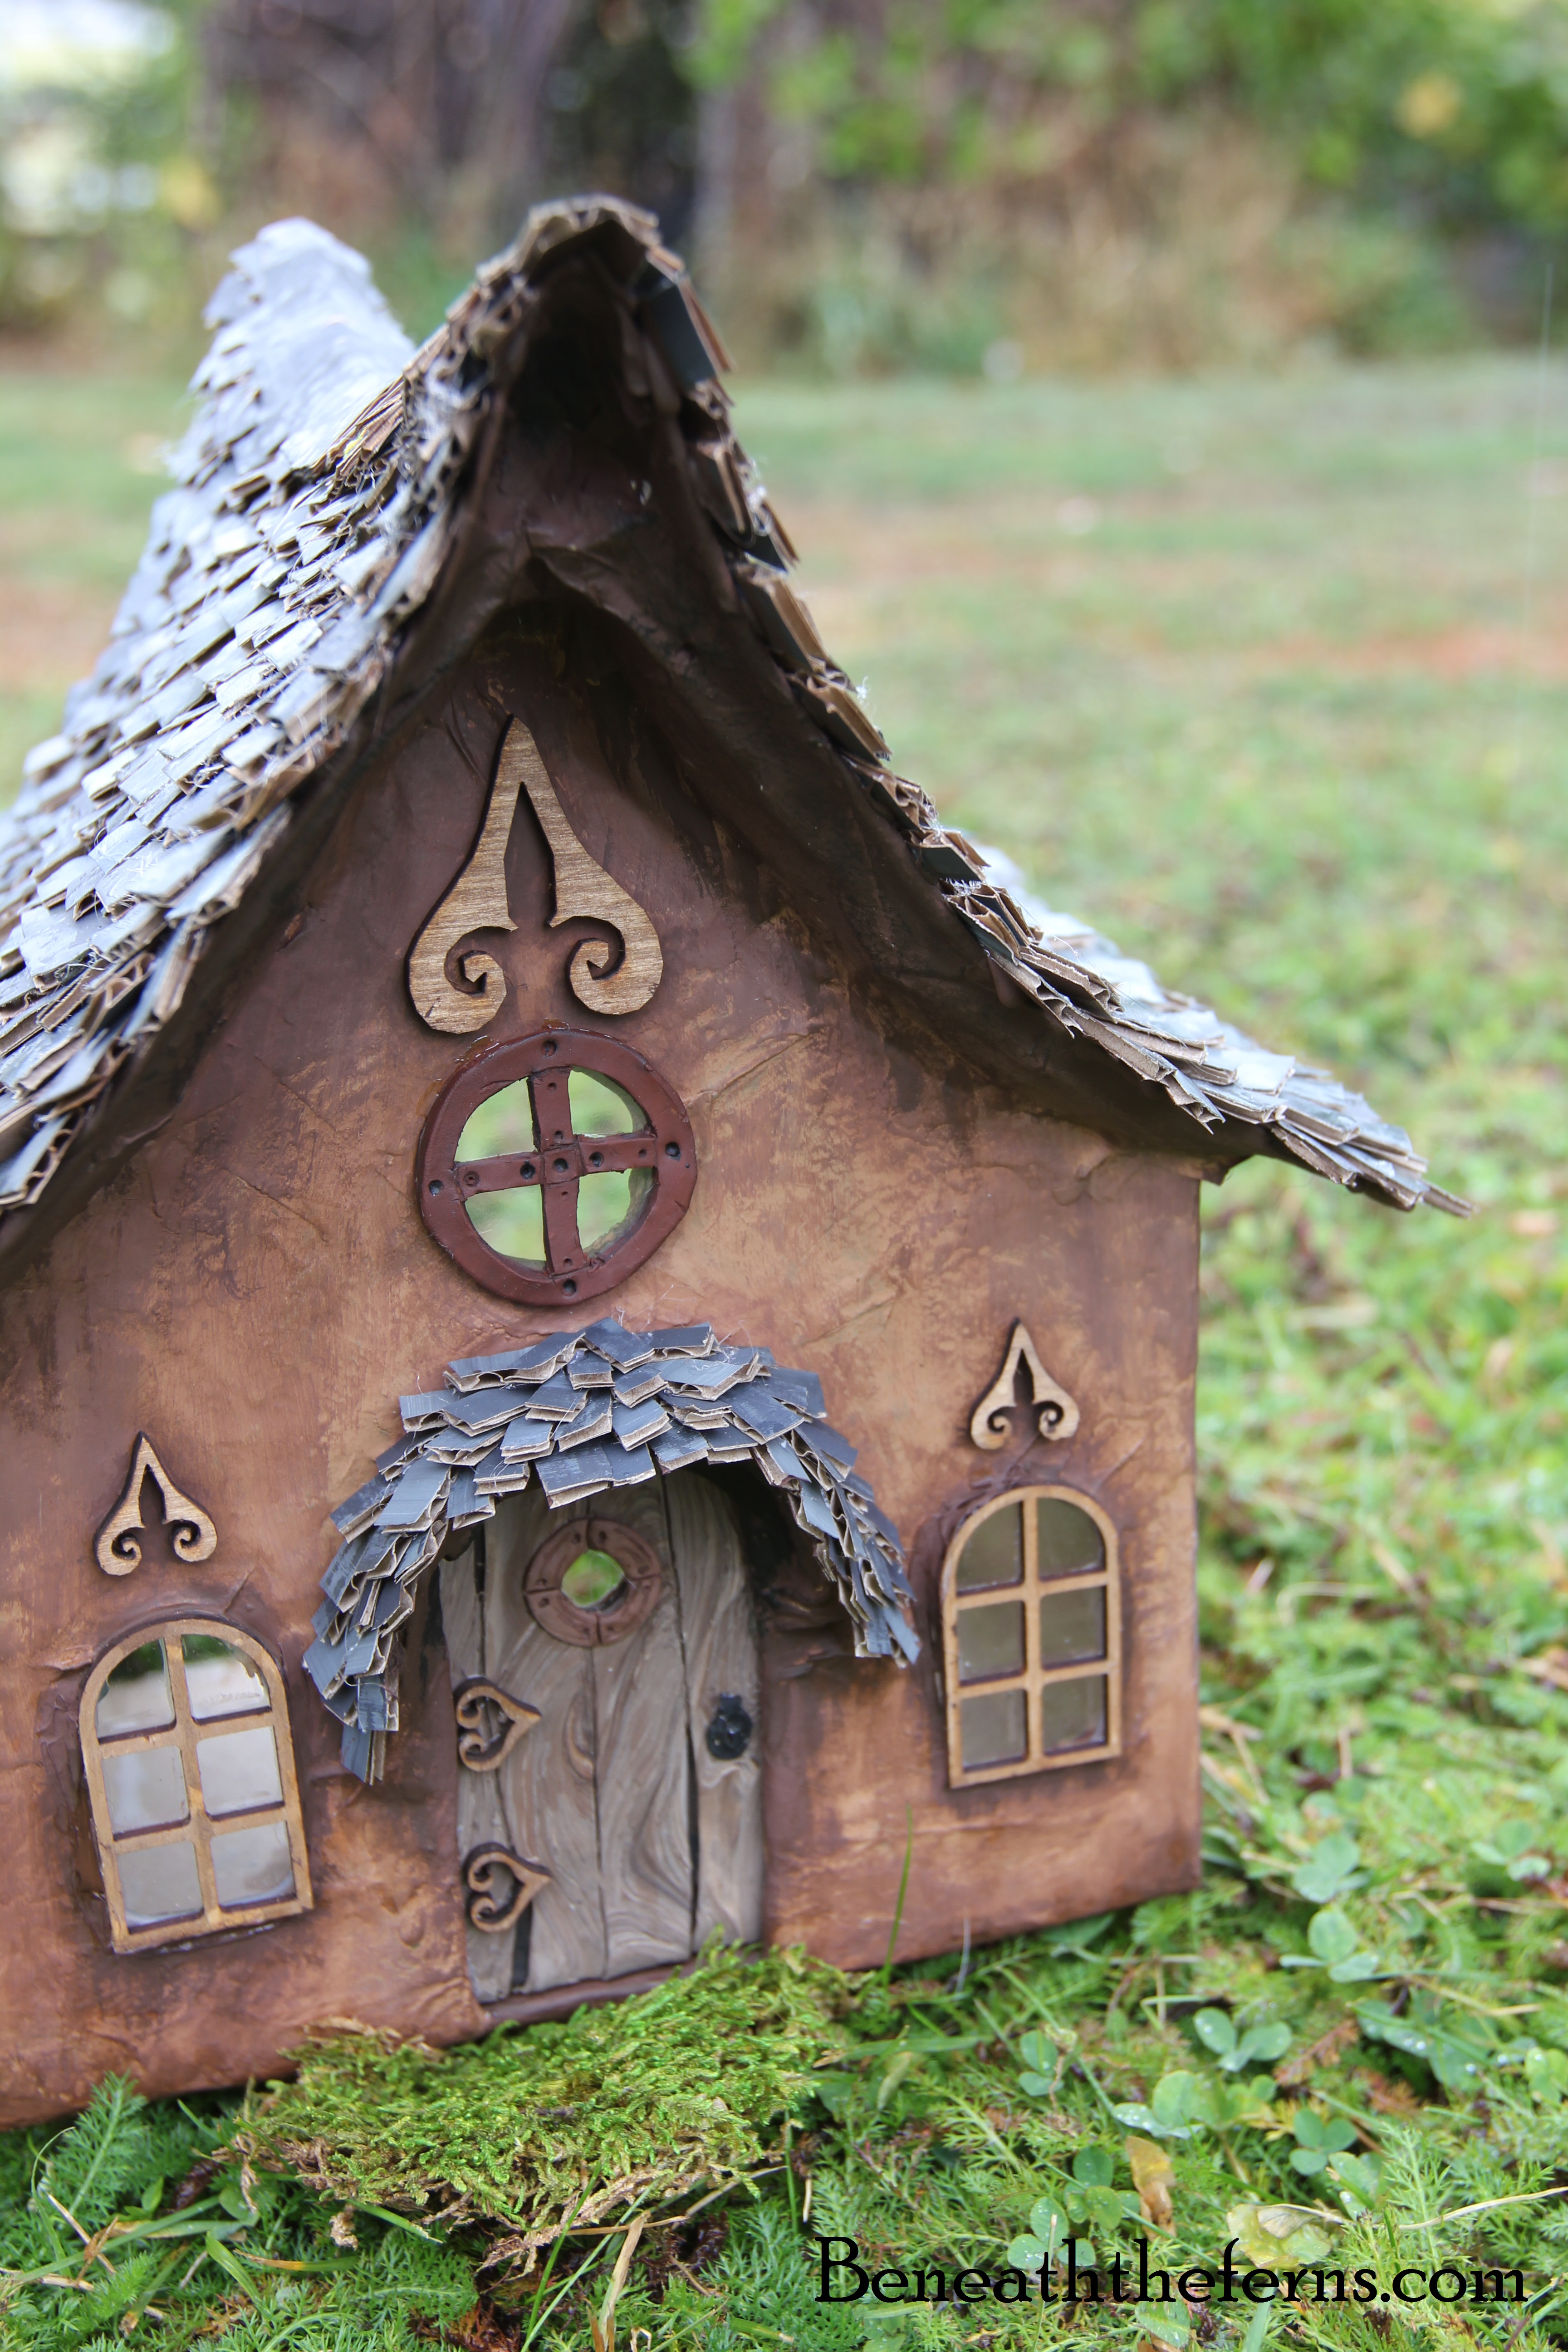
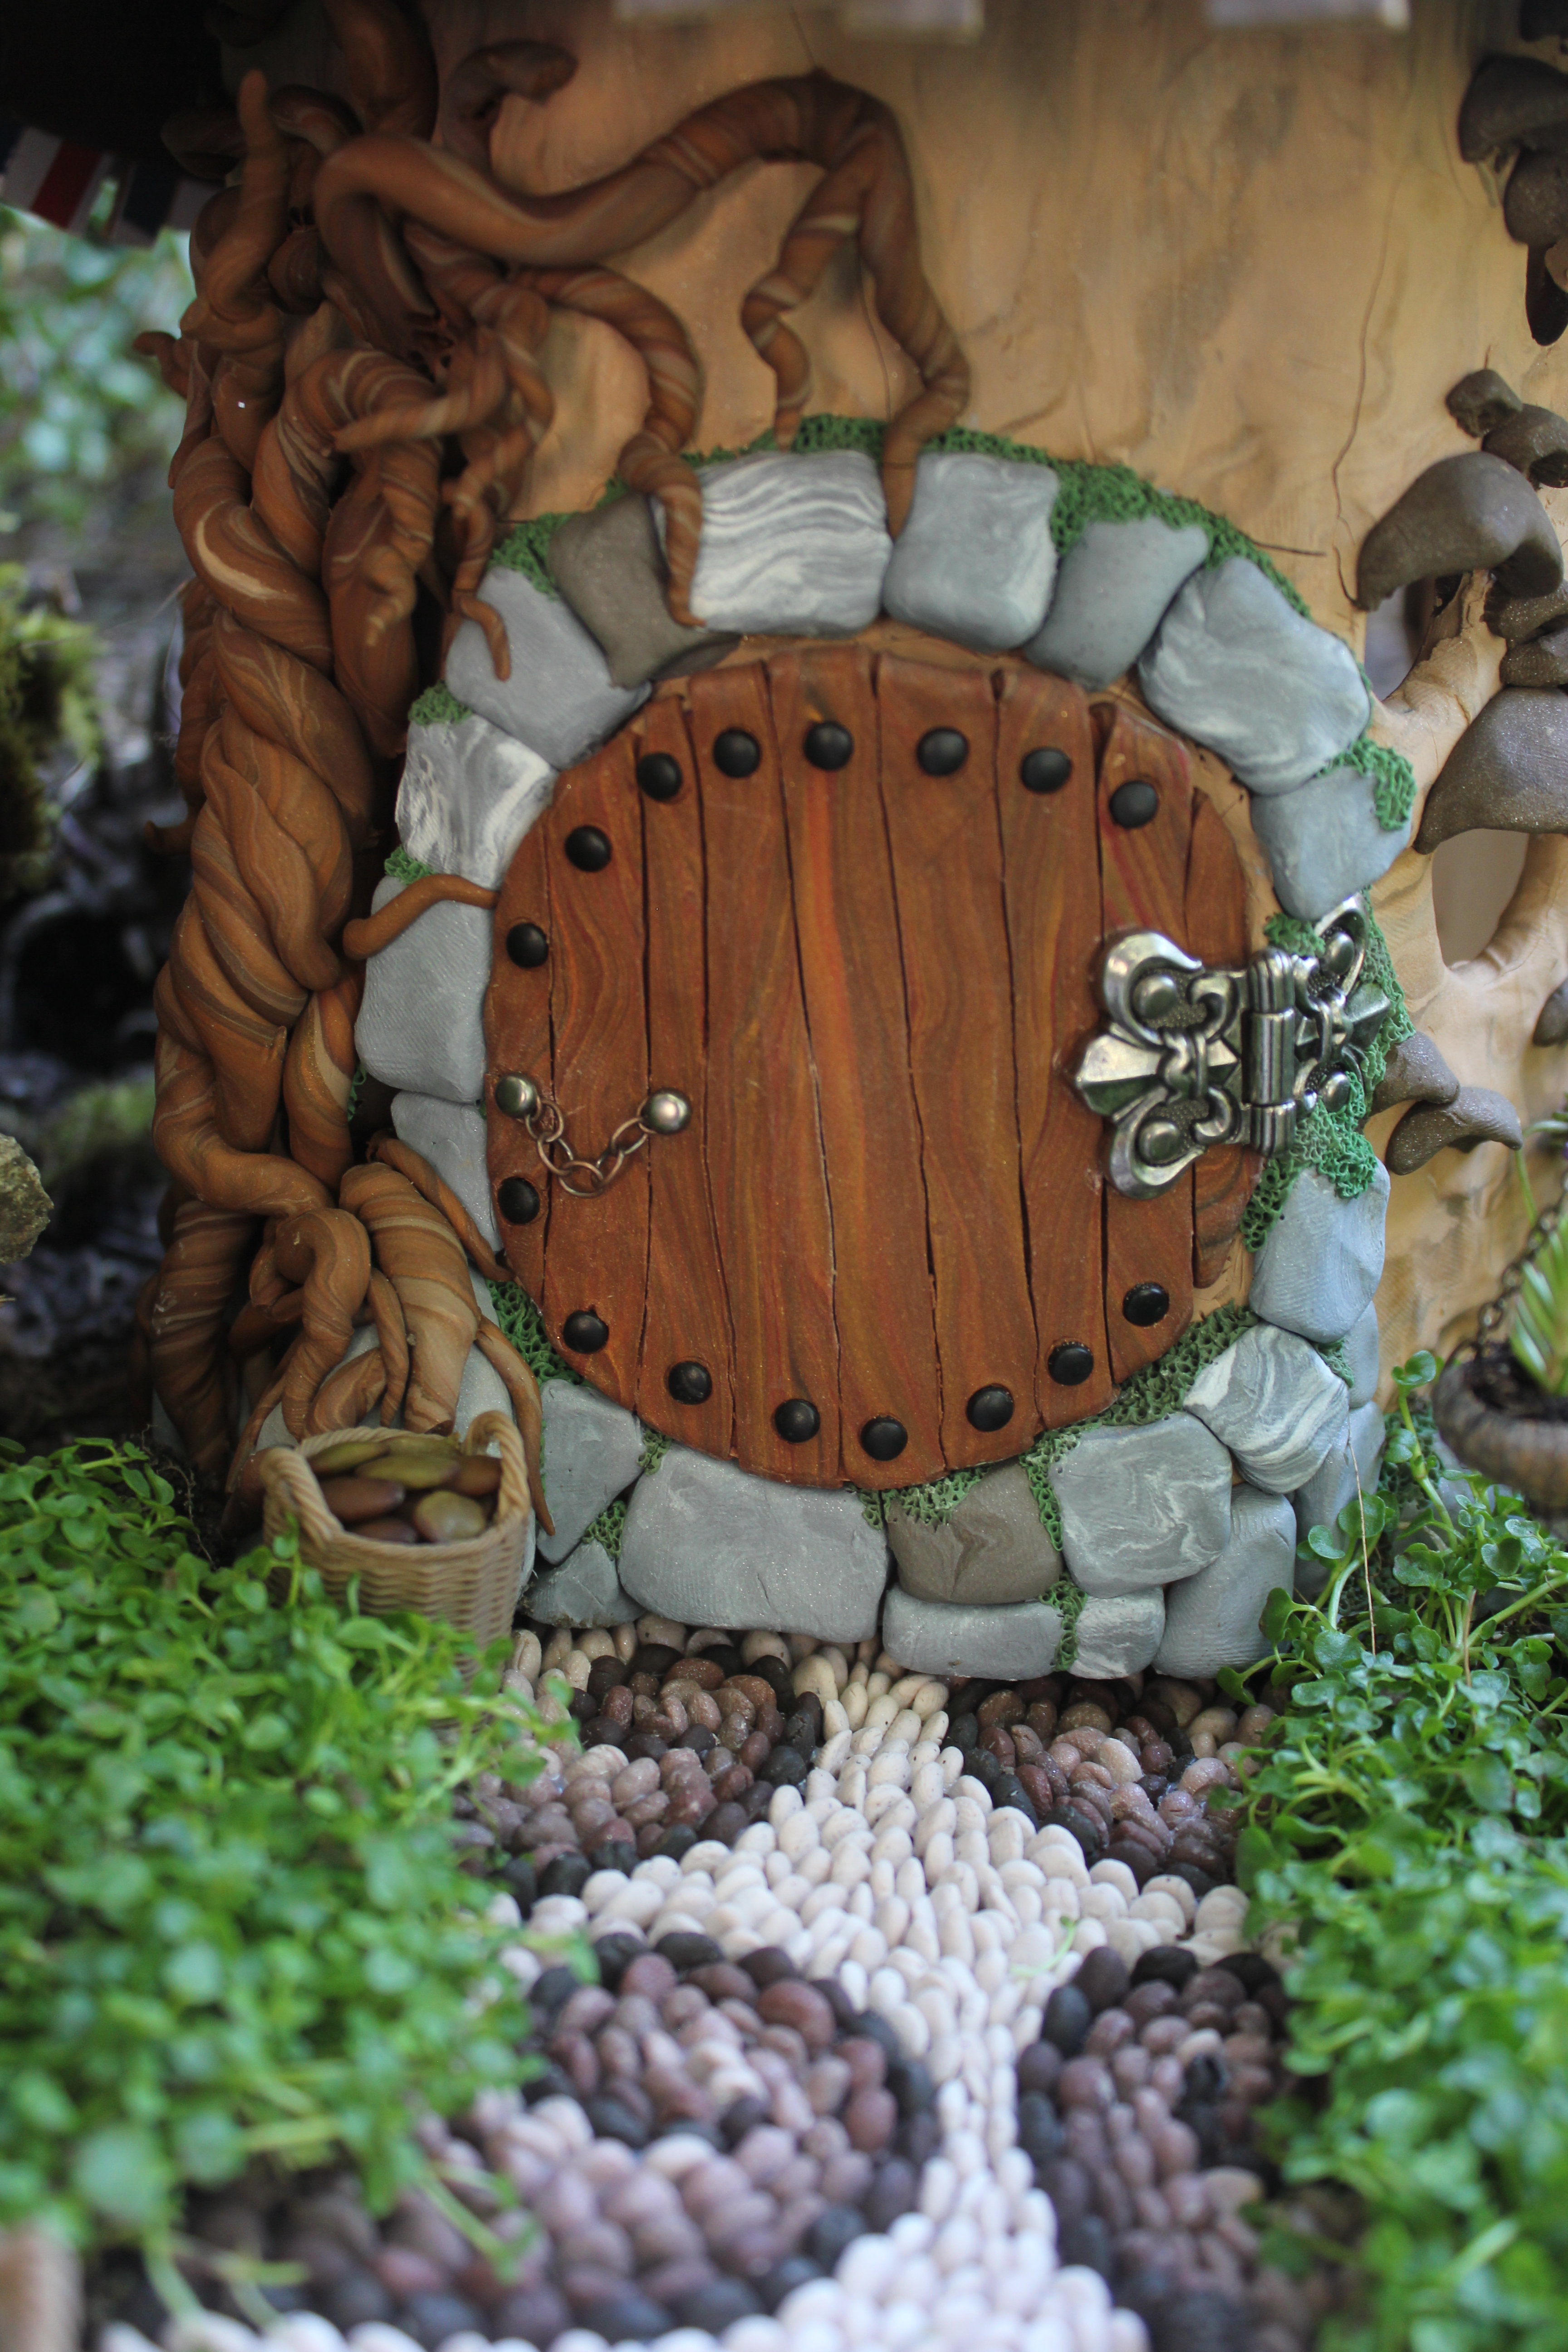
The front door of their cozy home.
Hobbit house door Fairy house fairy garden miniatures at beneaththeferns.w... #Fairyhouse #fairygarden #miniature #beneaththeferns

Fairy house fairy garden miniatures at beneaththeferns.w... #Fairyhouse #fairygarden #miniature #beneaththeferns 10

Fairy house fairy garden miniatures at beneaththeferns.w... #Fairyhouse #fairygarden #miniature #beneaththeferns 6

I didn’t know if this process would work or not, but I’m glad I took the chance! Now I’ll have to brainstorm my next design…

~ Jessi

(Don’t want to forget this? Just pin for later: ♥)
Tutorial Fairy house fairy garden miniatures at beneaththeferns.w... #Fairyhouse #fairygarden #miniature #beneaththeferns